What is a Campaign?
A campaign is the schedule in which a newsletter is emailed to readers. Within the campaign, the URL that Email Reach gets scraped is defined, along with email subject line options.
There are two different types of campaigns – Single Run or Recurring. Single-run would send one-time at the time of send. Recurring will automatically send on a recurring basis.
📝 Access to the Email Reach Campaigns section requires the mailinglist/main/Full access permission. Users without this permission will see an "Action Restricted" message.
How to navigate between accounts
If you have multiple Constant accounts tied to your BLOX Email Reach you can navigate between accounts using the dropdown at the top of the page. When switching between accounts, the campaigns for that account will populate in the search pages. You can also narrow your search results by list or segment.
Sending Campaigns to Lists and Segments
BLOX NXT Email Reach introduces the ability to send to segments. Segments are currently set up in Constant Contact and give you the ability to send to users based on data points or filter lists based on user behaviors.
See more information on setup and best practices with Segments here.
Creating a new campaign
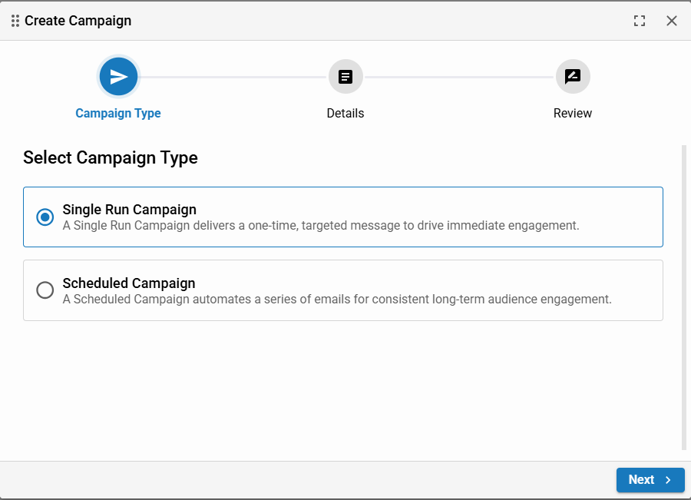
To create a new campaign, navigate to the Campaigns page using the left navigation within the BLOX Email Reach admin, and click “+ New” to open the Campaign Wizard.
Select whether the item will be a single run campaign or a scheduled campaign. A single run will send one time, while a scheduled campaign will send on a predetermined campaign schedule.
To send a Single Run Campaign:
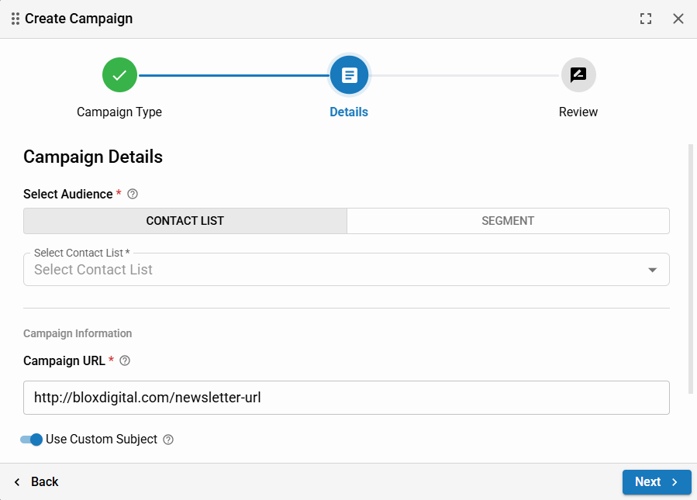
Select the options for a one-time send:
Contact List or Segment: The list or segment that you to which want this campaign to send
URL: Define the URL where the newsletter page is located. This is the webpage that gets scraped and packaged to a user within an email. While any URL may be pasted into this field, Email Reach is designed to only work with pages using the Email URL skin. URL skins such as Editorial, Business and e-Edition will not work and will be unreadable by Email Reach.
Subject: Define how the subject line will appear for the newsletter within email clients. By default the subject line will pull from the URL that you are using to scrape. Toggle to add a custom subject line.
To set up a Scheduled Campaign:
Contact List or Segment: The list or segment that you to which you want this campaign to send to.
Campaign Title: The name of the campaign. This will be used throughout the admin and in reporting.
URL: Define the URL where the newsletter page is located. This is the webpage that gets scraped and packaged to a user within an email. While any URL may be pasted into this field, Email Reach is designed to only work with pages using the Email URL skin. URL skins such as Editorial, Business and e-Edition will not work and will be unreadable by Email Reach.
Subject: Define how the subject line will appear for the newsletter within email clients. By default the subject line will pull from the URL that you are using to scrape. Toggle to add a custom subject line.
Disable: Select this option to disable the campaign schedule.
Schedule Type & Duration/ Recurrence Configuration:
Weekly: This option will allow you to select the days of the week that you want your newsletters to send. You can choose daily, certain days every week or certain days of the week on biweekly basis.
Monthly: This option will allow you to schedule on a specific day each month (i.e. 1st, 15th) or schedule for a specific weekday each month (i.e. first Monday of every month). It also allows you to change frequency to every 2, 3, etc. months.
Start Date: The day the email schedule will become active
Send Time: Time of day the email schedule will send
Run Indefinitely: Toggle to select whether you want your campaign to run for an indefinite time or to set an end date of when this campaign will become inactive.
On a weekly schedule, you select days of the week that you want the campaign to send. Select all days of the week for daily.
For a monthly schedule, you can set for a specific date or a specific weekday.
Your schedule will give you an output showing exactly when your campaign will begin sending and what days it will send.
How to edit a campaign
To edit an existing campaign, navigate to the Campaigns page using the left navigation within the BLOX Email Reach admin, and view all of your campaigns. You can also filter by List or Segment, depending on which element the campaign is using. Then use the dropdown to select the list or segment associated with that campaign.
Click the campaign you want to edit. You will see the Review page in the Campaign Wizard. Some editing options include:
Disable campaign: Click the Details option on the Campaign Wizard and toggle the Disable Campaign option to the on position.
Enable campaign: Click the Details option on the Campaign Wizard and toggle the Disable Campaign option to the off position.
Change Schedule: Click the Schedule Type and Duration page to start the scheduling wizard again.