⚠️ BETA. Please pardon our dust, this area is under construction. ⚠️
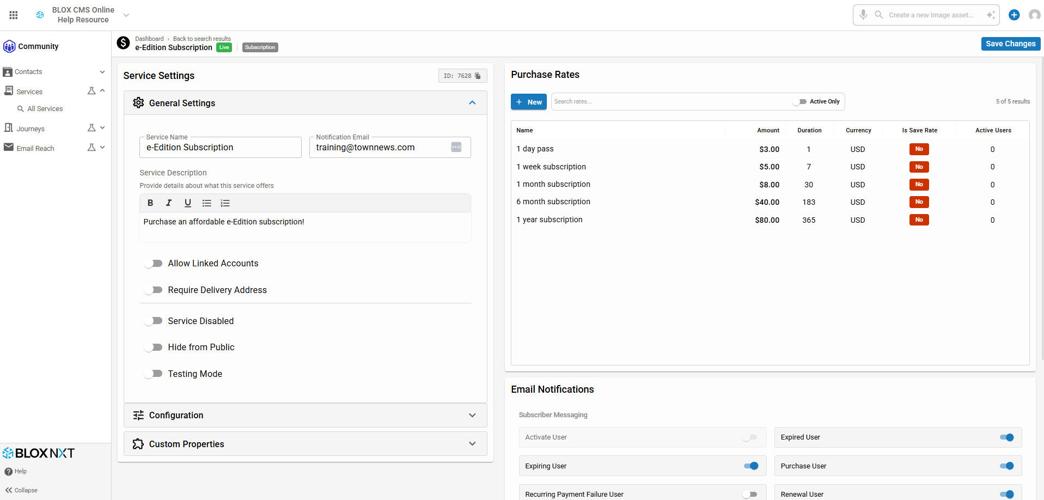
TheService Detail Viewprovides administrators with a full-screen workspace for viewing and managing individual services withinCommunity. From this page, admins can navigate using the breadcrumb trail, review key service information and status flags, and access configuration panels forService Settings,Purchase Rates, AI Smart Subscriber Upload andEmail Notifications. Depending on the service type, available options may include general settings, subscription and payment configuration, and custom properties—all designed to simplify service setup and maintenance.
Overview
Designed to streamline service management, the Service Detail View allows administrators to view and edit services in a full-screen experience.
This overview describes the various areas of the Service Detail View, including the Breadcrumb Navigation, the Save Changes option, and depending on the type of the selected service, the Service Detail View displays the Service Settings, Purchase Rates, AI Smart Subscriber Upload and Email Notifications Settings of the service selected from the Services Search.
The Service Detail View within Community.
Breadcrumb Navigation
The Breadcrumb Navigation section is prominently displayed at the top of the Service Detail View. It includes a breadcrumb trail that starts with the “Dashboard” and includes a link labeled “Back to search results”.
Below that, the Service Name is displayed followed by Service Flags indicating if the service is Live/Disabled, Hidden, or in Test mode. Lastly the Service Type is displayed.
Save Changes
Editing is currently under construction. More details coming soon!
Service Settings
Settings is divided into a couple of sections, General Settings, Configure, and Custom Properties.
General Settings
The General Settings panel displays general service information.
Service ID: This service ID will be referenced in notification emails and in the data/feeds FTP directory.
Linked Accounts: The Linked Accounts option allows the subscriber to share their subscription with family and friends. This option will only be available if your domain has enabled the Linked account access option. To view this setting, open the Legacy CMS Admin, open Subscription (the ‘Subscription’ application in the upper left menu under ‘Community’), click to open the Application settings (the ‘gear’ icon in the upper right), and select Linked Accounts.
Require Delivery Address: This option should be enabled if all subscribers must provide a delivery address. If this box is checked and there is no delivery address associated with the account in the CSV file, the account will not be activated.
Notification Email: Enter up to three email addresses (separated by commas) that will receive an email notification when;
a change is made to the CSV file for a Delimited Verification service.
a user subscribes to the service.
Description: The description field is not a required field but should generally be used, as it will display for the users of the site. In most cases, you'll want to provide the users with a description of the service they are purchasing.
Disabled: If enabled, the service will be completely disabled. All associated subscriptions and subscription transactions will remain, but the service will not be available for future selection by user. It will display in the Service Search with the ‘Disabled’ flag.
Hidden: If checked, the service will remain active but not display on the front end. This means that the URLs that are blocked by this service will still continue to be blocked, but users will not be able to sign up for this service to gain access.
Testing: If checked, every transaction gets marked as a test transaction in the transactions list.
📝If a payment handler is set up and configured, such as PayPal, it will run the transaction through the payment handler's test processor but it will not actually take any money.
Configure
Within this panel, options relating to subscription and payment handler are defined.
Custom Properties
The Custom Properties panel provides the option to add custom properties to a service.
Purchase Rates Window
The Purchase Rates panel will allow the administrator to search for, edit, and add purchase rates. With the New Rate Editor, you can update the service and configuration settings, manage email notifications, and add or change custom properties.
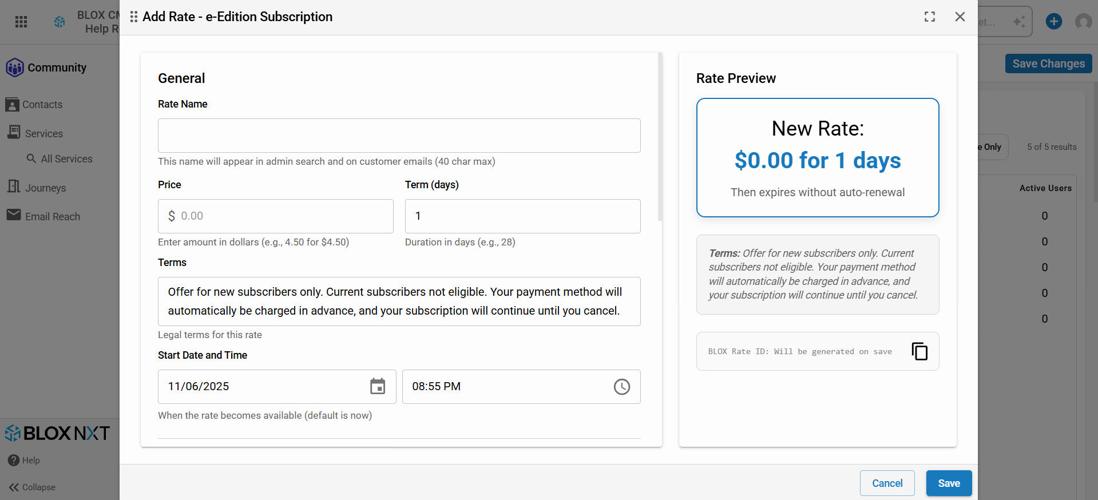
Add New Rate
The Purchase Rate Editor - Add New Rate
This window will appear if your service allows rate configuration. Click on the blue "New" button to create your new rate by editing the following fields. You can preview your new rate in the sidebar panel.
Once your rate is created, you will need to assign the rate in your Journeys tab.
General
Rate Name
Price
Term
Terms (Legal / Usage)
Start Date and Time
Lifecycle
Rate is Always Available - Unclick this option to further edit when the rate would expire or appear on the website.
Transition Settings
Enable Rate Changes - Click this option to bring up further options that limit the total times this rate can be used, and if it expires, what will follow.
Additional Settings
Save Rate for Cancellation - Only use this field if you want to limit offering this rate to users who are at risk of cancelling.
Using this flag will turn the rate green on your Purchase Rates window, instead of red.
Hide Rate from Website - The rate will only be used for auto-renewing transactions.
External ID - Only needed if you wish to label this rate in accordance with an external database.
Require Promo Code - Only use if you want to require a promo code for advertising and marketing purposes, or wish to limit your new rate.
Promo Code(s)
Edit Rate
📝Please keep in mind, once a rate is created, you will no longer be able to change the pricing or term duration. If you wish to do this, you must remove and re-create the rate.
Once a rate is created, you can edit the fields accordingly by clicking on any part of the rate in the Purchase Rates table.
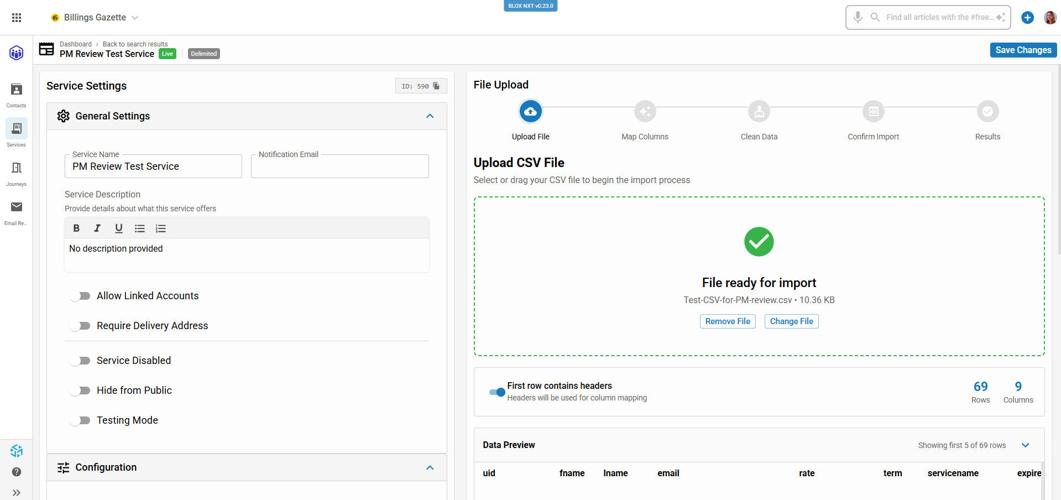
AI Smart Subscriber Upload
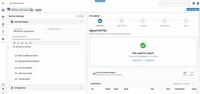
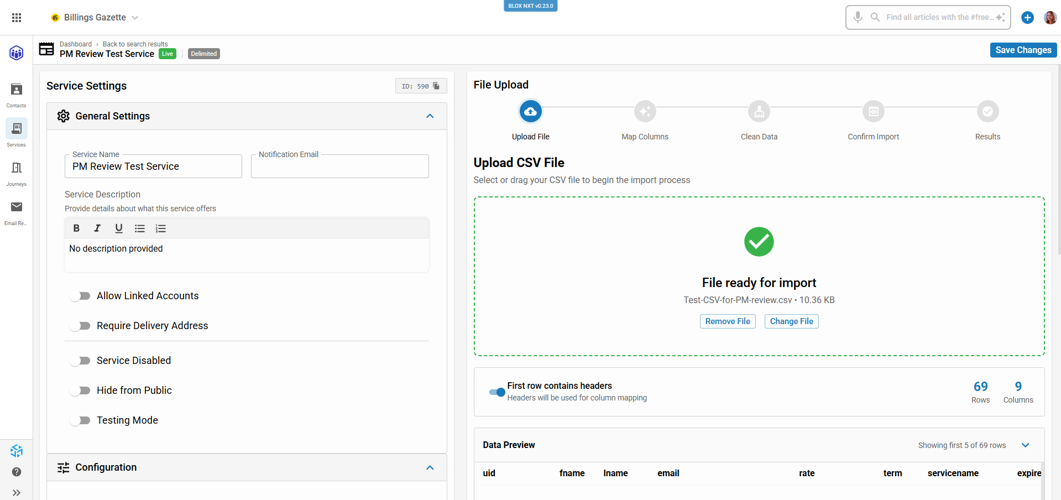
If your service was created as Delimited type, you will get a window that allows you to upload subscribers via CSV file, with AI-powered column mapping and data validations.
AI Smart Subscriber Import
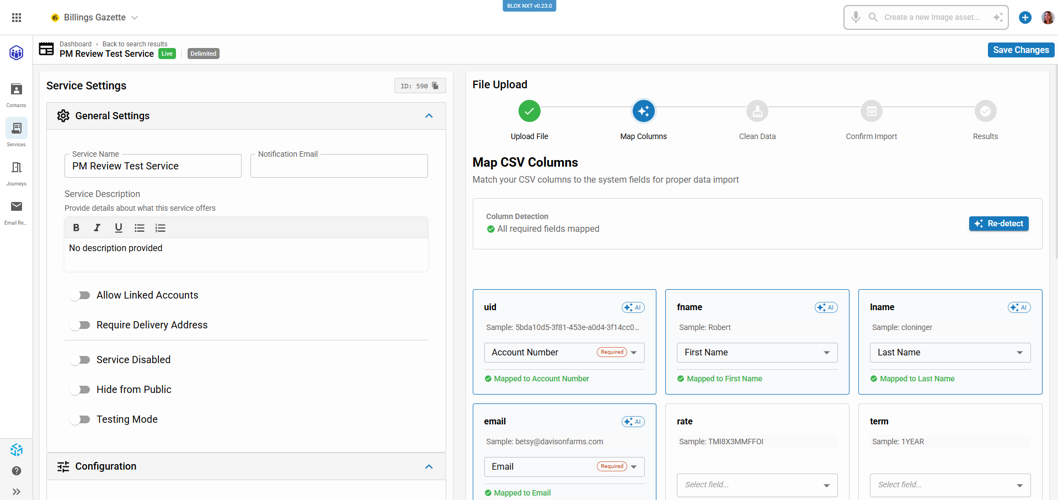
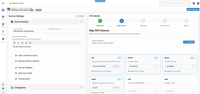
AI Smart Subscriber Import - Map Columns
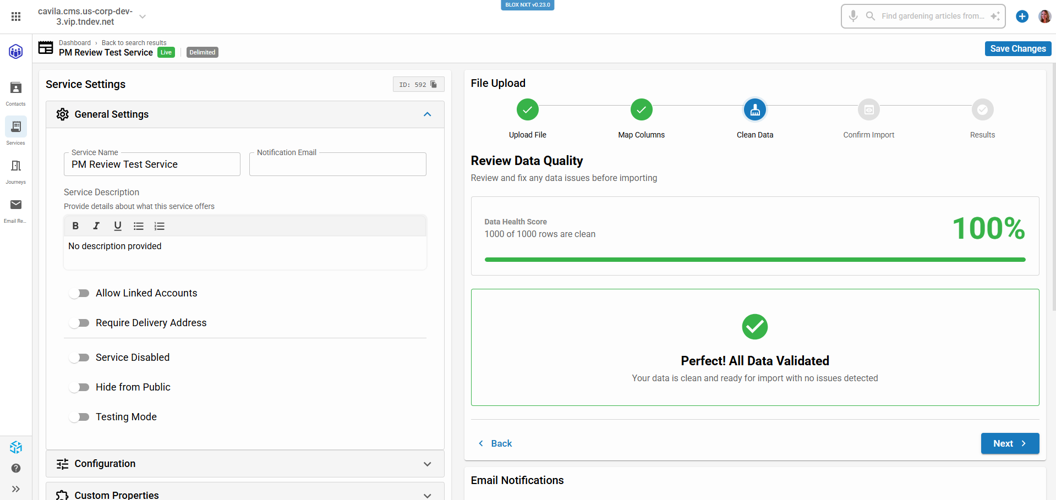
AI Smart Subscriber Import - Clean Data - No Errors Detected
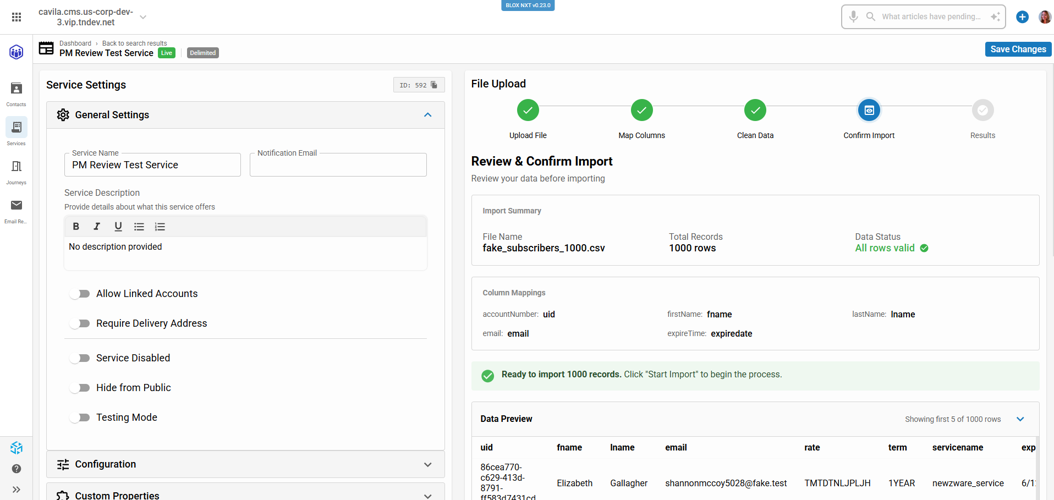
AI Smart Subscriber Import - Ready to Confirm
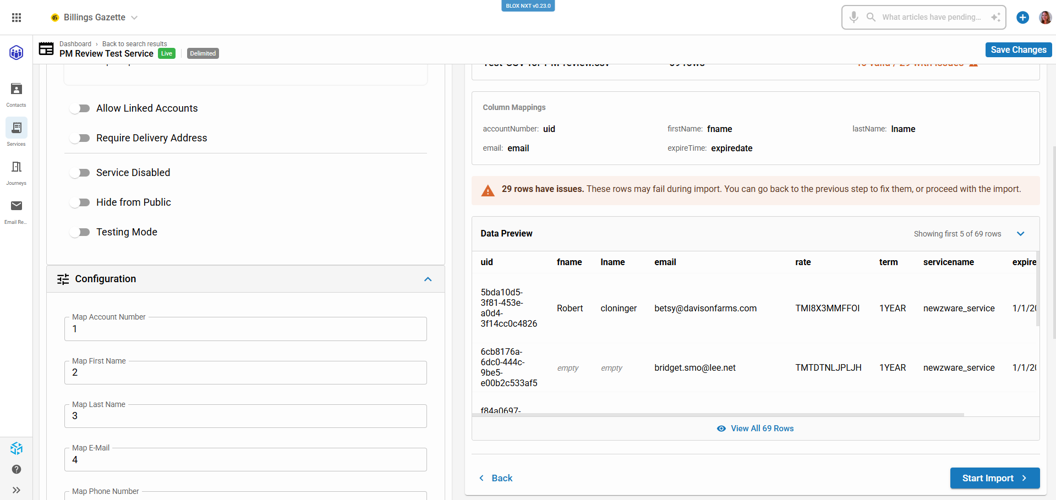
AI Smart Subscriber Import - Errors
AI Smart Subscriber Import - Success
AI Smart Subscriber Upload Steps (Gallery)
AI Smart Subscriber Import
AI Smart Subscriber Import - Map Columns
AI Smart Subscriber Import - Clean Data - No Errors Detected
AI Smart Subscriber Import - Ready to Confirm
AI Smart Subscriber Import - Errors
AI Smart Subscriber Import - Success
To use this tool from your Services tab:
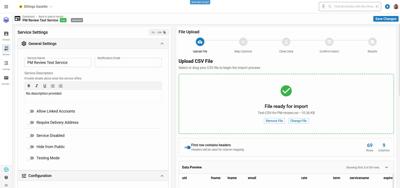
Click Upload File and drag/drop your CSV file.
The system will check the file for errors.
Map Columns → match CSV fields (Account Number, First Name, Last Name, Email, Rate, Term, etc.) to system fields.
Clean Data → review data quality. Errors (if any) are flagged for correction.
If all rows are valid → you’ll see Perfect! All Data Validated (100%).
Confirm Import → preview records, verify mapping, and confirm.
Results → system shows number of rows imported and a preview of sample records.
Status shows Success once complete.mail Notifications Settings
Email Notifications
The Email Notifications Settings panel allows the administrator to configure what actions trigger an email either to an end user or to an administrator.
It will also allow the administrator to view and edit those emails.