The Relationships tool with ‘Children’ selected in the Relationship Filter and showing;
a selected image outlined in blue with the ‘Insert Selected’ option available
another couple of images with the ‘Inline’ tag
the ‘Remove selected assets’ option
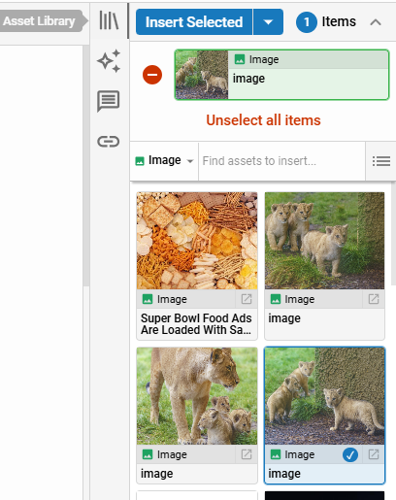
The Asset Library tool with ‘Image’ selected in the Asset Type Filter with option to change the display to a list view, a selected image outlined in blue with ‘Insert Selected’ options available, the red minus icon next to unselect the selected image, and the ‘Unselect all items’ option below the selected image.
The Asset Library tool showing the additional ‘Insert Selected’ options after assets are selected.
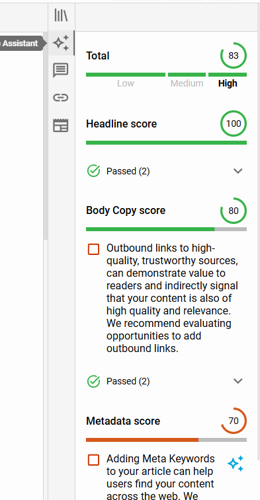
The Assistant tool showing;
a Total Optimization Score of 83
a Headline score of 100
a Body Copy score of 80
feedback to improve one of the components of the Body Copy score
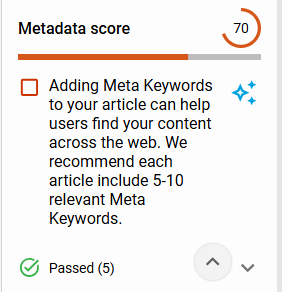
A Metadata score of 70
feedback to improve one of the components of the Metadata score and a link to a related AI-Powered Suggestion
The Assistant tool showing an AI-Powered Suggestion ‘sparkle’ icon to improve your Keywords entered.
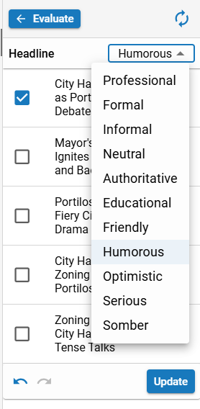
The Assistant tool showing the available Tone Adjustments while viewing AI-Powered Suggestions.
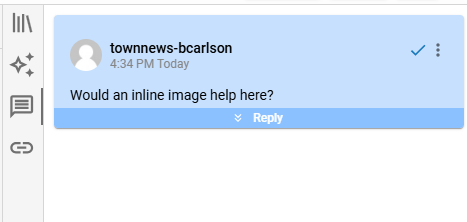
The Comments tool showing a comment, an option to Reply, an option to resolve the comment thread (the 'checkmark' icon), and the comment options menu.
The Add Publications dialog.
blox nxt
Article Toolkit Panel
Introduction
The Article Toolkit Panel is designed to enhance the content creation and management process. It offers quick access to several key features, allowing editors to efficiently find, insert inline, and manage related media via Relationships (‘link’ icon) and Asset Library (‘books’ icon) Tools respectively, diagnose article content quality via the Assistant (‘sparkle’ icon), and view and respond to internal comments via the Comments Tool (‘speech bubble’ icon). Additionally, the Article Toolkit Panel provides access to Print Publications settings (‘newspaper’ icon) for sites that have BLOX Total CMS.
Prerequisites
Certain features described within this documentation may require additional software, abilities, settings, or may only be accessible under specific conditions.
Article Toolkit Panel access: The Article Toolkit Panel is only available when viewing an Article Asset.
AI-Powered Suggestions and AI-Powered Tone Adjustments availability: Only sites that have the ‘Enable Content Extensions’ setting enabled will see the ‘sparkle’ icon to access AI-Powered Suggestions and AI-Powered Tone Adjustments. See Content Management Settings for additional information.
Asset Library
The Asset Library (‘books’ icon) provides a user-friendly interface for managing and inserting unrelated assets into articles. The options within the Asset Library tool streamline the process of finding, relating, and inserting assets into an article ensuring a more cohesive and engaging experience for the reader.
The Asset Library tool with ‘Image’ selected in the Asset Type Filter with option to change the display to a list view, a selected image outlined in blue with ‘Insert Selected’ options available, the red minus icon next to unselect the selected image, and the ‘Unselect all items’ option below the selected image.
Searching the Asset Library
Editors may refine the Asset Library tool search results by selecting a specific asset type, such as ‘Image’ or ‘Video’, in the Asset Type Filter or by entering keywords into the ‘Find assets to insert…’ search bar. Results will be displayed in an infinity scroll within the Asset Library tool.
📝By default when you first click to open the Asset Library in a given session, the search will be blank and the Asset Type Filter will default to ‘All’. As you return the the Asset Library subsequent times, your previous Asset Type Filter and search will persist. If you click to open the Asset Library via an Asset Placeholder, your previous search will still remain but the Asset type Filter will be set to the type of the Asset Placeholder. For additional information on Asset Placeholders seeArticle Content Panel.
Click to select the assets you wish to use in your article content.
View Toggle: By default, the Asset Library tool displays results in a grid view. Optionally, the editor may choose to toggle to a list view. This setting will persist until the end of the session.
Reviewing Selected Assets
Editors can review selected assets before insertion. Click on ‘n Items ^’, where ‘n’ is the number of assets selected, to the right of the ‘Insert Selected’ button to see a list of the selected assets.
There are a few ways selected assets may be unselected if needed. Individual assets may be unselected by clicking on the asset outlined in blue in the Asset Library. Alternately, from the expanded list of selected assets, assets may be individually unselected by clicking the red minus icon to the left of the listed asset or the editor may click the ‘Unselect all items’ option at the bottom to unselect all of the selected assets.
Insert Options
There are a couple of ways related assets may be placed inline into article content allowing for precise placement and seamless integration.
Editors may drag and drop selected assets from the Asset Library tool directly where they want them placed into the Article Content Panel or they may use the ‘Insert Selected’ button to place the selected assets directly into the content below the current paragraph. Both of these options stablishes the selected assets as children assets, which are related directly to the article.
The Asset Library tool showing the additional ‘Insert Selected’ options after assets are selected.
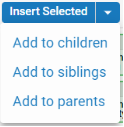
Additionally, after selecting one or more assets from the Asset Library tool, the ‘Insert Selected’ button provides an additional option to insert the selected assets directly inline into the Article Content Panel, ‘Add to children’.
📝 'Add to siblings' and 'Add to parents' options are also available to establish content relationships but they do not insert the selected assets directly inline into the Article Content Panel.
Insert Selected: Insert the selected assets directly into the content below the current paragraph. Establishes the selected assets as children assets, which are related directly to the article.
Add to children: Depending on the asset type, this either inserts the selected image or video assets into the Media Gallery Placeholder near the top of the Article Content Panel or inserts the selected assets that are neither video nor image into the Additional Content Placeholder near the bottom of the Article Content Panel. Establishes the selected assets as children assets, which are related directly to the article. For additional information about the Media Gallery Placeholder or the Additional Content Placeholder, see Article Content Fields.
Add to siblings: Establishes the selected assets as sibling assets, indicating a parallel or related content.
Add to parents: Establishes the selected assets as a parent asset, indicating a broader category or overarching content relationship.
Opening Library Assets
Assets may be opened by clicking the ‘Open in new tab’ option that’s either located in the lower right of the asset tile (in grid view) or located in the upper right of the asset tile (in list view). Clicking ‘Open in new tab’ will open the asset within a new browser tab.
Assistant
The Assistant (‘sparkle’ icon) is designed to enhance the quality and search ranking performance of article assets. It evaluates the article content and related metadata based on a set of predefined rules and provides real-time feedback to editors, helping them optimize their work throughout the story creation process.
The Assistant tool showing;
a Total Optimization Score of 83
a Headline score of 100
a Body Copy score of 80
feedback to improve one of the components of the Body Copy score
A Metadata score of 70
feedback to improve one of the components of the Metadata score and a link to a related AI-Powered Suggestion
Optimization Score
The Optimization Score reflects the overall quality of the article. It is calculated based on the truncated percentage (no decimal) of the total of 300 possible points, 100 each for the three main components, Headline score, Body Copy score, and Metadata score. This score updates dynamically as the editor makes changes, providing a clear indication of the article's current state.
Total Optimization Score = ((Headline score + Body Copy score + Metadata score) / 300) * 100
Headline Score
The Headline score assesses the quality and relevance of the headline. For example, it may suggest that the headline is too long or lacks relevant keywords. Each component score is all or nothing.
Headline - entered: Yes (+20 points)
Headline - length: Ideal (+30 points)
Headline - contains at least one matching Keyword: Yes (+50 points)
Total Headline Score: 20 + 30 + 50 = 100 points
Body Copy Score
The Body Copy evaluates the main article content, offering suggestions like adding more media or outbound links to enhance engagement and credibility. Each component score is all or nothing.
Related media - inserted: Yes (+30 points)
Outbound links - included: Yes (+20 points)
Content - length: Ideal (+50 points)
Total Body Copy Score: 30 + 20 + 50 = 100 points
Metadata Score
The Metadata score checks the completeness of Metadata elements such as Keywords, SEO Title, SEO Description, URL Title, Social Title, and Social Summary which are crucial for search engine visibility. Each component score is all or nothing.
The Assistant tool allows the editor to click the ‘sparkle’ icon to obtain AI-powered suggestions for several of the component scores. These suggestions are tailored to align with the specific rules.
The Assistant tool showing an AI-Powered Suggestion ‘sparkle’ icon to improve your Keywords entered.
Headline - Ideal length /contains at least one matching Keyword: AI-generated headline suggestions that follow best practices for Headline length and Keyword usage, when Keyword(s) are present.
Keywords- number entered: Semantically suggested Keywords that are relevant to the article content. Keywords are given a “Confidence” score which ranks keywords based on accuracy. The Keyword suggestions will automatically pre-select up to 5 keywords to ‘Add’ based on existing Keywords to encourage reaching the suggested minimum of 5.
SEO Title- length: AI-generated SEO Title suggestions that follow best practices for SEO Title length.
SEO Description- length: AI-generated SEO Description suggestions that follow best practices for SEO Description length.
Social Title- length: AI-generated Social Title suggestions that follow best practices for Social Title length.
Social Summary- length: AI-generated Social Summary suggestions that follow best practices for Social Summary length.
URL Title- length: AI-generated URL Title suggestions that follow best practices for URL Title length.
AI-Powered Tone Adjustments
The Assistant tool showing the available Tone Adjustments while viewing AI-Powered Suggestions.
While viewing the AI-powered suggestions, the Assistant tool also offers options to adjust the tone.
Except for Keywords suggestions, Editors can choose from various tones such as Professional, Formal, Informal, Neutral, Authoritative, Educational, Friendly, Humorous, Optimistic, Serious, and Somber. This flexibility ensures that the content aligns with the desired voice and style of the publication.
Relationships
Relationships (‘link’ icon) provide a streamlined interface for managing and viewing the relationships of the current asset. Assets may be related to other assets as Children, Sibling, or Parents. All assets related to the asset being viewed will reside in this panel.
View Toggle: By default, Relationships displays results in a grid view. Optionally, the editor may choose to toggle to a list view.
The Relationships tool with ‘Children’ selected in the Relationship Filter and showing;
a selected image outlined in blue with the ‘Insert Selected’ option available
another couple of images with the ‘Inline’ tag
the ‘Remove selected assets’ option
Relationships Filter
The Relationships Filter, shown here with ‘Children’ selected, offers a dropdown menu to filter and view assets by the different relationship types, Children, Siblings, or Parents.
Children: Children Assets that are closely related to the given asset and are considered highly relevant and integral to the content. For example, an image asset may appear as a Child asset to an article asset.
Siblings: Sibling Assets generally includes content that complements or provides additional context but is not as closely tied to the primary focus of the given asset. For example, an article asset may appear as a Sibling asset to another article asset.
Parents: Parent Assets represents a broader category or overarching theme. For example, an article asset may appear as a Parent asset to an image asset.
Insert Options
There are a couple of ways related assets may be placed into article content allowing for precise placement and seamless integration. Editors may drag and drop selected assets from the Relationships tool or they may use the ‘Insert Selected’ button to place the selected assets directly inline into Article Content Panel below the current paragraph.
Inline Assets: Assets that have been placed into an article asset inline, will have an ‘Inline’ tag associated with them. All non-inline children assets will either appear within the Media Gallery Placeholder or the Additional Content Placeholder within the Rich Text Editor in the article asset based on their asset type. For additional information about the Media Gallery Placeholder or the Additional Content Placeholder, see Article Content Fields.
Removing Relationships
You can remove relationships by choosing the 'Remove selected assets' option after selecting the relationship(s) you want to delete.
📝Inline assets may not be removed this way without first deleting that asset’s placeholder within theArticle Content Panel.
Opening Related Assets
Related assets may be opened by clicking the ‘Open in new tab’ option that’s either located in the lower right of the asset tile (in grid view) or located in the upper right of the asset tile (in list view). Clicking ‘Open in new tab’ will open the asset within a new browser tab.
Comments
The Comments tool (‘speech bubble’ icon) provides a streamlined interface for managing, viewing and responding to, internal comments placed in current article.
The Comments tool showing a comment, an option to Reply, an option to resolve the comment thread (the 'checkmark' icon), and the comment options menu.
To create a comment, highlight any text within the Article Content and click 'Add Comment'.
To reply to a comment, hover over the comment you want to reply to and click 'Reply'.
To edit a comment, hover over the comment you want to edit, click the comment options menu, and select, 'Edit'.
To delete a comment, hover over the comment you want to delete, click the comment options menu, and select, 'Delete'.
To resolve a comment thread, hover over the comment thread you want to resolve, click Resolve (the 'checkmark' icon).
Publications
The Add Publications dialog.
The Publications tool (‘newspaper’ icon) provides the ability to schedule the print publications associated to the current article.
📝The Publications Tool settings is only available for sites that haveBLOX Total CMSand Publications cannot be created when the article is in draft status.
To schedule the print publications associated with the current article, follow the directions below.
Click ‘+’ in the Publications tool
Enter the required fields (Publication, Publication Date, and Geometry)
Optionally enter any of the optional fields
Click Confirm
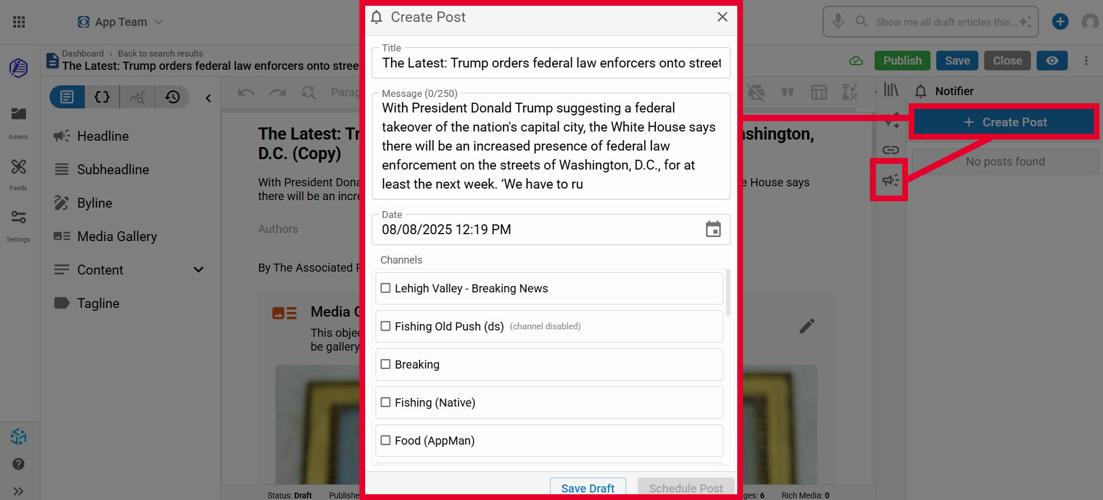
Notifier
Notifier allows editors to push posts/alerts directly from an editorial asset to generate more pageviews from Facebook, Webhooks, Emails, and Push Notifications.
📝Notifier pushes are only available for users with Edit permissions. Users with Read access will only be able to view scheduled pushes.