The built-in BLOX user registration form fields can be customized or removed, while new fields can be introduced, allowing for a completely unique user registration experience.
Registration Fields
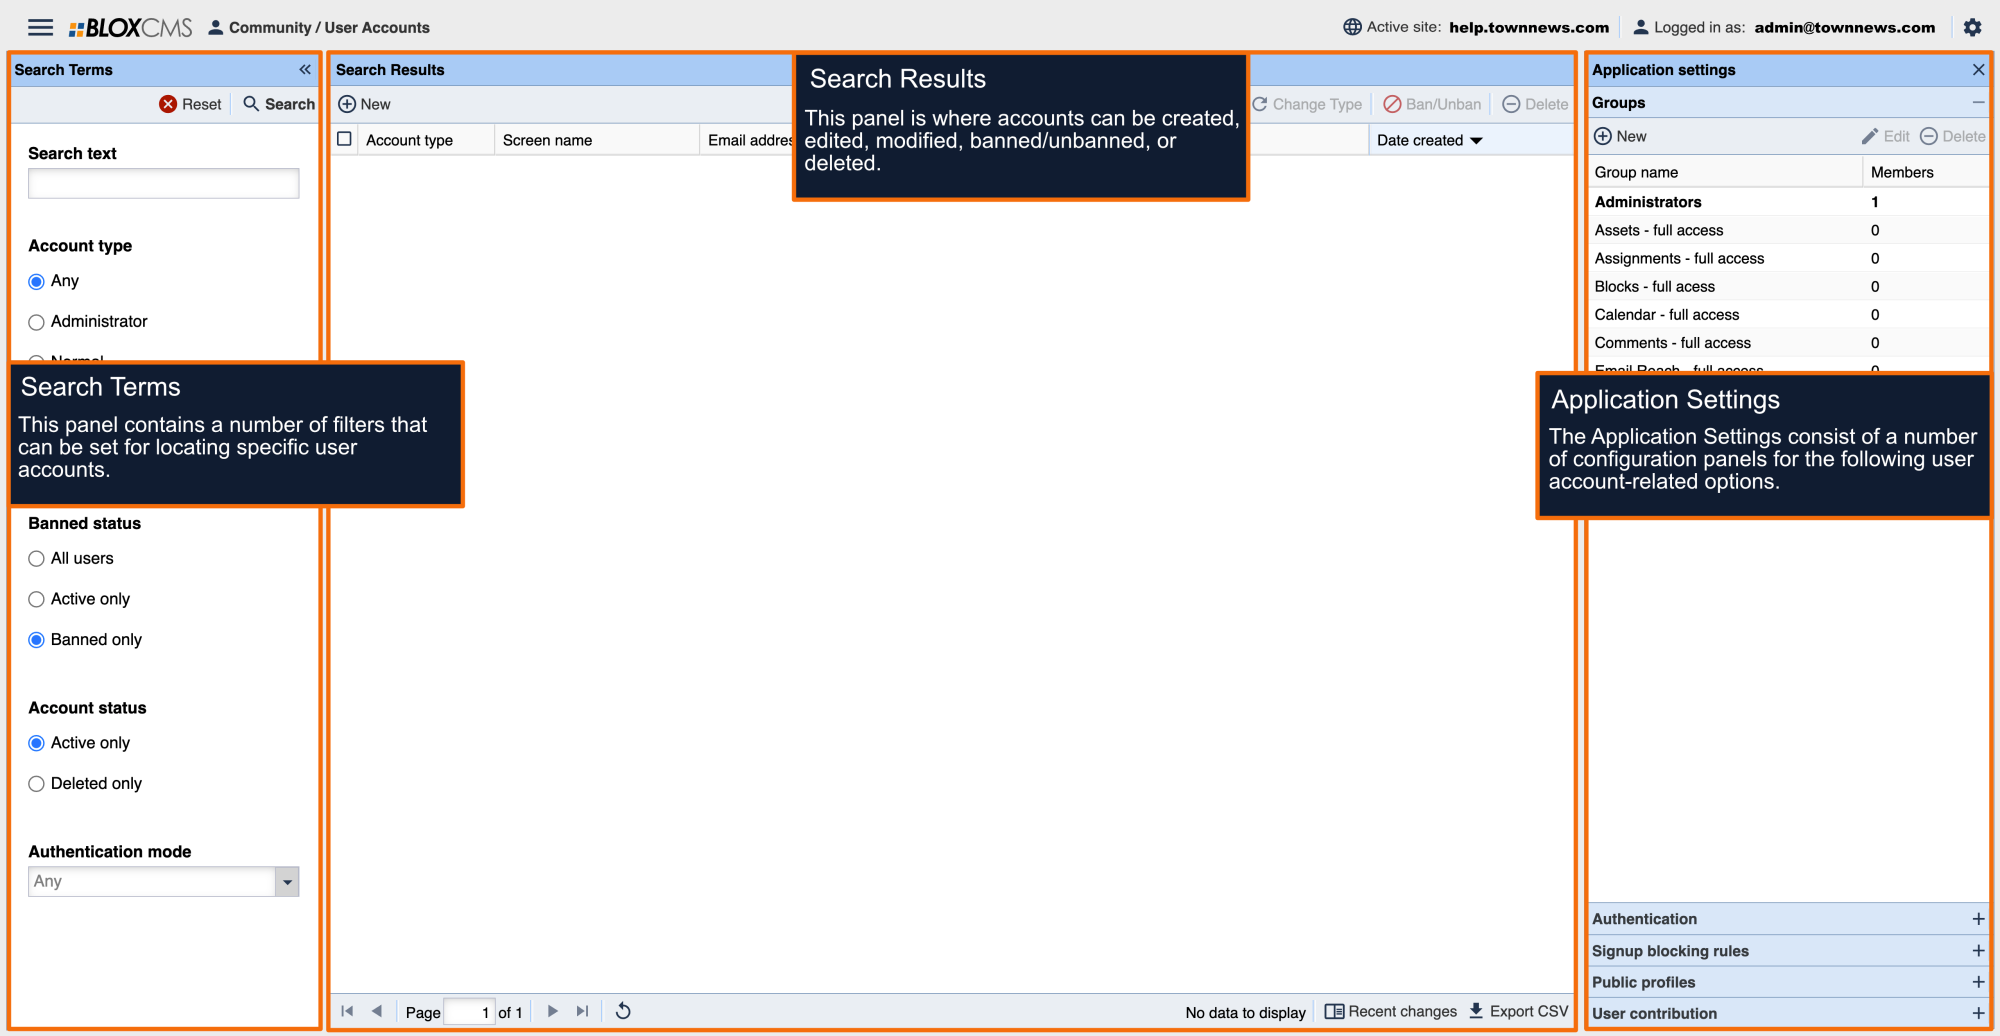
The Registration fields can be viewed by viewing the Page Customizations of the /users URL.
The following fields are in place by default:
- Username
- First and last name (if the "user names: post using real names" setting is enabled in within the Editorial Application settings, this field will automatically display.)
- Confirm Email
- Phone
- Address
- Birthday
Each field has the same three options:
- Available (Users can fill it in, but it is not required)
- Required (Users must fill this field in)
- Hidden (Does not show to users)
BLOX CMS Template Access
Custom registration fields may be created within Design Templates. Templates access is required, however.
Custom Registration Fields
First, select the correct template set. There are two sets of templates in Design / Templates. Both sets of core templates are exactly the same. To determine which templates you are using, go to Design / Templates / Site templates / Skins / Editorial. If the name of Flex is highlighted in blue this is the set of templates you are using. If not, check in Design / Templates / Flex / Skins / Editorial for the the same thing.
NOTE: it does not matter what set of templates you are on, this is for how TownNews will roll out new templates in the future. Eventually all sites will be on Design / Templates / Flex. If you create a new URL map, which we will discuss later in this training, you will be able to decide which Template library you are using. If this is the case, best practice would be to choose Flex.
Open Components / _Site / macros.
Right click on macros folder, select new file. The file can be called anything you want, but must have an extension of .utl (Ex: registration.utl)
Copy the code below and paste into the file created in step 4.
[%- macro opt_userRegisterBottom() -%]
<label class="col-md-3 col-lg-2 control-label" for="input-custom1"><span class="text-danger">*</span> CUSTOM TEST</label>
<div class="col-md-9 col-lg-10">
<input id="input-custom1" class="form-control" type="text" name="custom_test" value="[% util_request('custom_test') %]" required>
NOTE: To add additional custom fields, duplicate the code between <fieldset> and </fieldset> as many times as you need.