Using Schedules in Design / Blocks, you can create a date and time range where a page on your website can be replaced with a custom webpage. This can be used to create custom pages for sports (Friday Night Varsity Football games), or setting up custom pages centered around events Breast Cancer Awareness Month, or creating special pages for holidays (Halloween, Christmas, News Years Eve, etc.).
NOTE: Utility regions do not work with Schedules.
To Create a Scheduled Page
In Design / Blocks click on Schedules to open it, and click the New button.
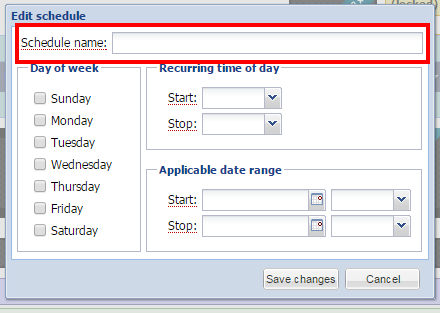
In the schedule window, create a Schedule Name.
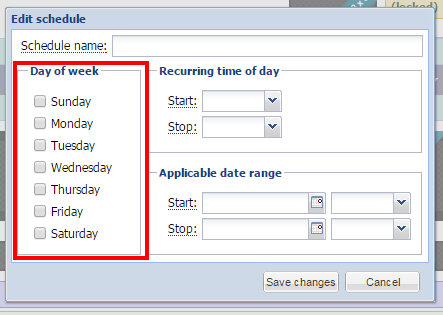
In the schedule window, select the Day of The Week this schedule will run. You can select multiple days.
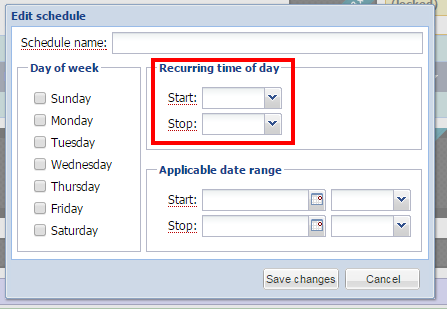
In the schedule window, choose the Recurring Time of Day start and stop times for this schedule. This is the time that the schedule will be enforced.
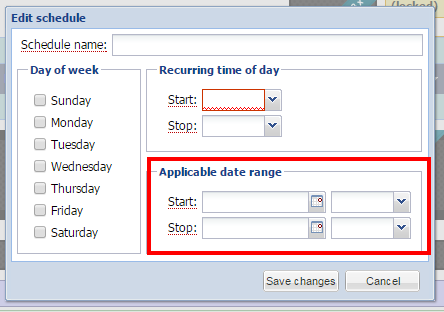
In the schedule window, set the Applicable Date Range for this schedule. This is the date range that this schedule will be enforced.
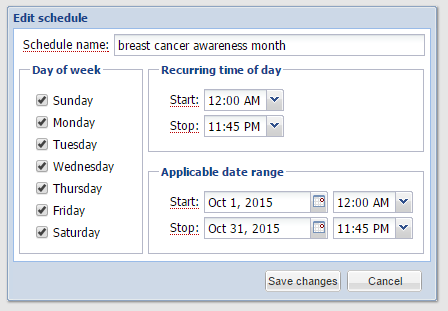
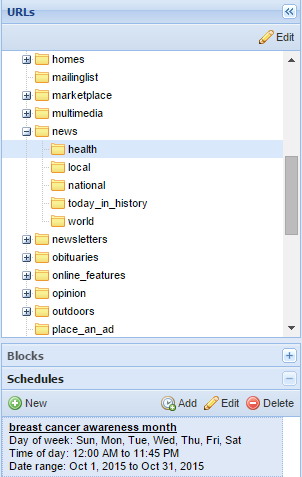
Your finished schedule window will look something like this:
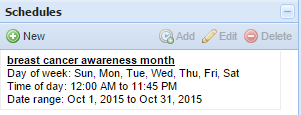
And in the Design / Blocks admin you will see:
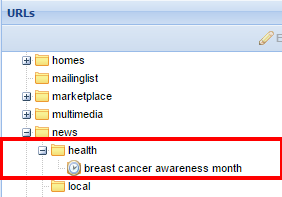
Now select the Schedule by clicking on it. Then go into URLs and find the page you want to apply this schedule to. Select it by clicking on it. Once the Schedule and URL are selected, the Add button on the Schedules Toolbar will become active; click on it.
You will will see a Clock icon and the name of your schedule.
This creates a blank page (think of it as a Virtual URL) that you will then build out with blocks like any other page. BUT, this version of the page will only show up during the scheduled dates and times that you set in the schedule. For more information on using blocks on a page see the Blocks: Content, Appearance, Links, Configuration, and Widget doc.
View time-specific front page preview
|
You can preview what this page will look like by going to the upper right corner of the BLOX admin, clicking on the down arrow beside Active Site and choose Preview Specific Time. You will set the date and time you want to see in the future, and click Preview. This will take you to the homepage, and the URL will look something like this: https://admin-chicago2.bloxcms.com/example.com/tncms/admin/action/main/preview/site/2015-10-03T04%3A28%3A00Z/-/
You will need to type the rest of the URL of the page you actually want to view. In our example we would add /news/health, to make our URL: https://admin-chicago2.bloxcms.com/example.com/tncms/admin/action/main/preview/site/2015-10-03T04%3A28%3A00Z/-/news/health
|
NOTE: Flex Template Users - Page Customizations cannot be set specifically for the scheduled page. Any changes you make will affect your current live page as well as your scheduled page.
For Umbrella Sites
If you have multiple sites within one main site, then this information pertains to you.
If you are going to use Block Schedules for a site within your main site (e.g. www.mymainsite.com/mysecondarysubsite), there are additional steps that may have to be taken into consideration depending on the scenario.
If the custom webpage you are scheduling needs to be applied to multiple URL's, you must one-by-one, add that Schedule to each specific URL. You will also need to add a Section Tag for each sub URL within your secondary site (for more information on adding a Section Tag, Click Here). Your Section Tags will be available to add to your assets. Here's an example.
Edit a Schedule
To edit a schedule, select the Schedule by clicking on it and clicking Edit. This will bring up the Edit Schedule window.
Delete a Page and a Schedule
Before deleting a schedule you should delete the scheduled page first. In URLs, select the name of the scheduled page you wish to delete. This will then show you a Remove button.
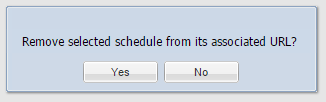
You will get a warning asking if you are sure you want to Remove Selected Schedule from it's Associated URL? Clicking Yes will remove the page but will leave the schedule. You could then assign that schedule to a new page.
Note: You CANNOT delete a schedule but leave a page. If you delete a schedule it will also delete the page at the same time.
To delete a schedule, select the schedule by clicking on it and clicking Delete.
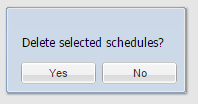
A warning will ask if you want to Delete Selected Schedules? If you have not removed the scheduled page (see above), then this action will delete BOTH the schedule and the scheduled page.