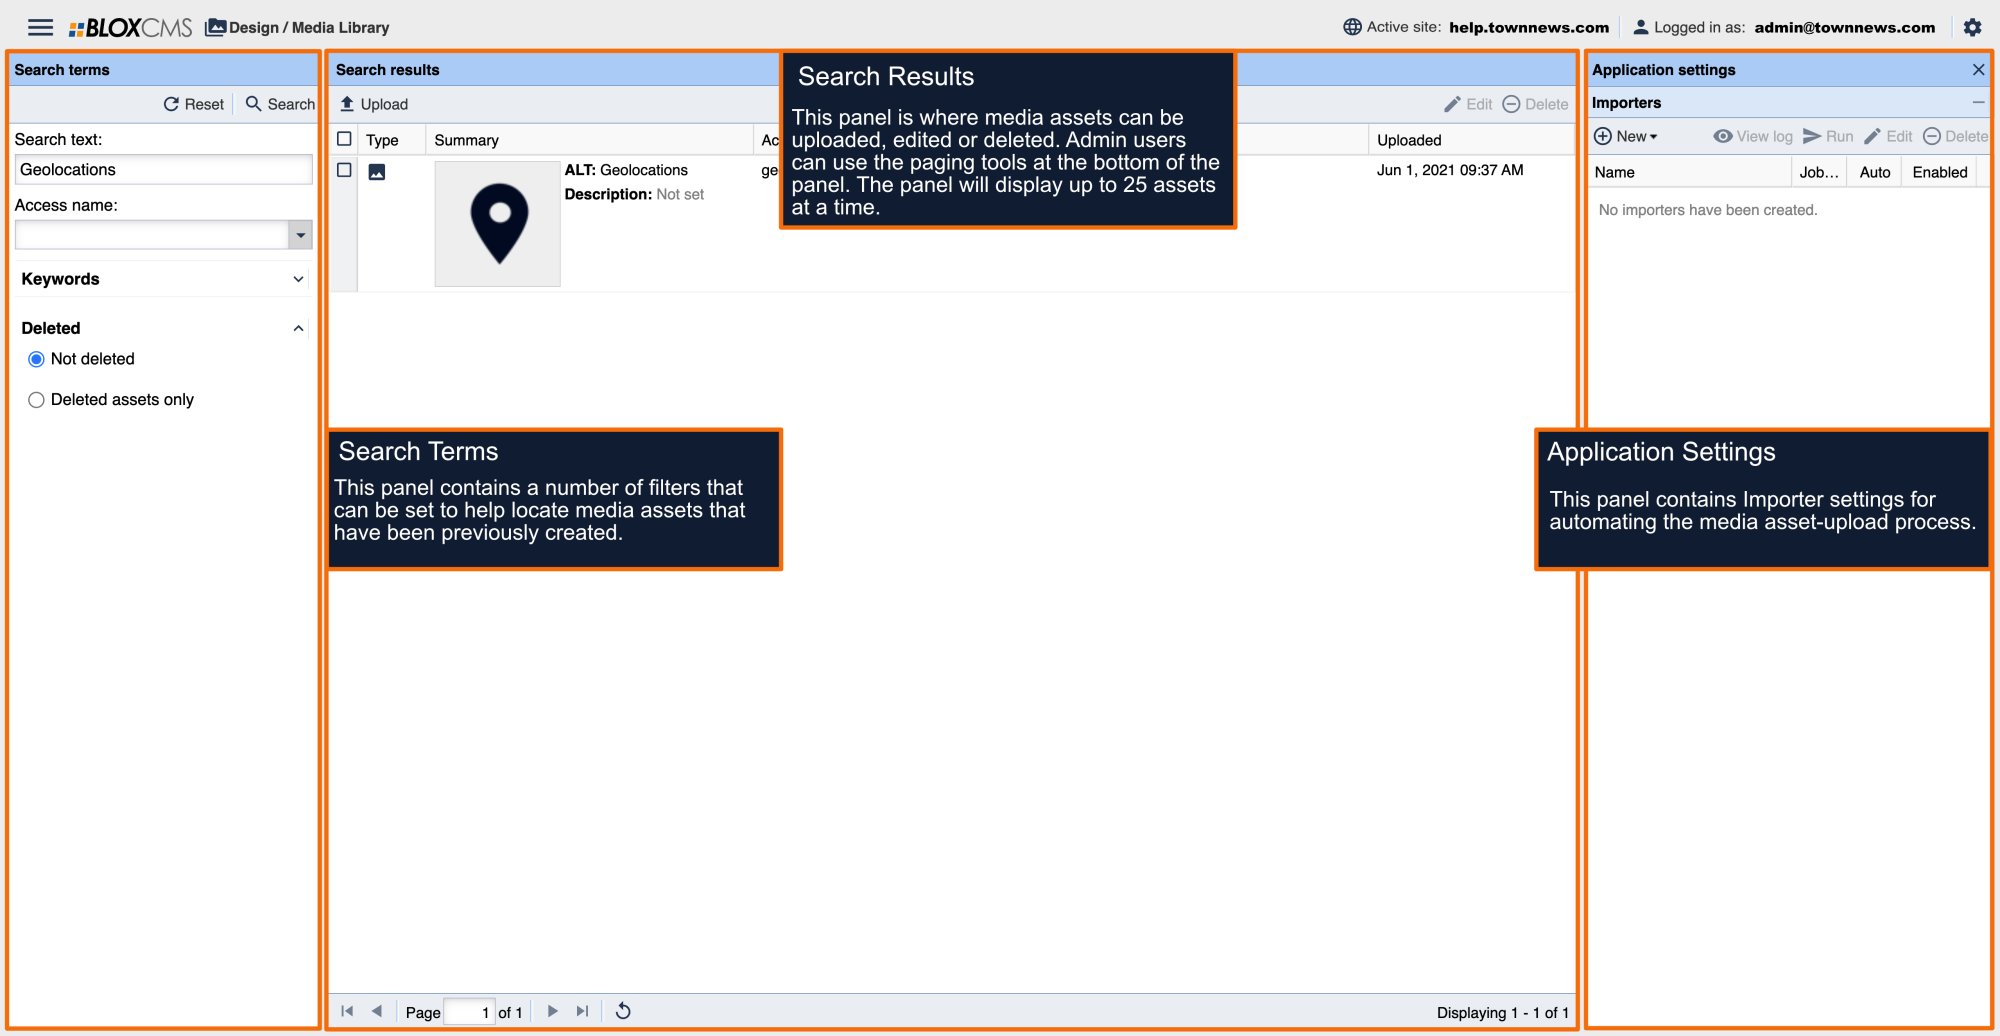
How to add images to the Media Library
Images can be added to the Media Library either individually or in groups.
To add to the Media Library, select Upload at the top of the Search Results panel. Next, within the Select files to upload panel, select the +Add files option to locate images from either your local machine or Dropbox account. Once the images have been selected, Media Library will start the upload-process.
Working with Media Library images
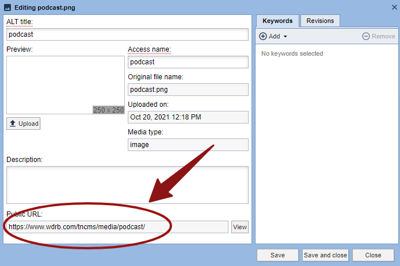
Images can be modified by either double-clicking the image within the Search Results panel or highlighting the asset and then choosing Edit. This will populate the Asset Editor.
ALT title: This is the name of the asset.
Access Name: The name used in the Public URL and it can't be used more than once.
Original File Name: This is the name of the file as originally uploaded.
Uploaded On: This is the the date when the asset was added to the Media Library.
Media Type: This is Media Type.
Description: This is the description of the asset. Description is only viewable to BLOX admins within the Media Library.
Public URL: The Public URL is the location of the image. The Public URL is used for embedding site images.
Keywords: Within the Keywords tab, Keywords can be added for locating Media Library images at a later date.
Revisions: Within the Revisions tab, the revisions history of the asset can be viewed.
Embedding Media Library images
The easiest way to embed your images is to link to the public URL in the media library asset. You can do this as a link asset or as a traditional link in the body copy. The Links panel under the Related tab could also be used.
Images within the Media Library don't support section tags and other query rules that Editorial image assets traditionally offer, so Media Library images need to be referenced via HTML instead of being targeted within content blocks.