The Business Directory User Dashboard gives registered users on your site the ability to manage their contributed content and manage all of their claimed business listings. They can also push out communications to subscribers if their business is associated with an Email Reach list already set up.
NOTE: The Email Reach product is an add-on to your BLOXCMS website. For information about adding it, please contact your regional sales rep. If you are not sure who your sales rep is, or you do not have their contact information, please contact TownNews Customer Support at (800) 293-9576 or Submit a Ticket.
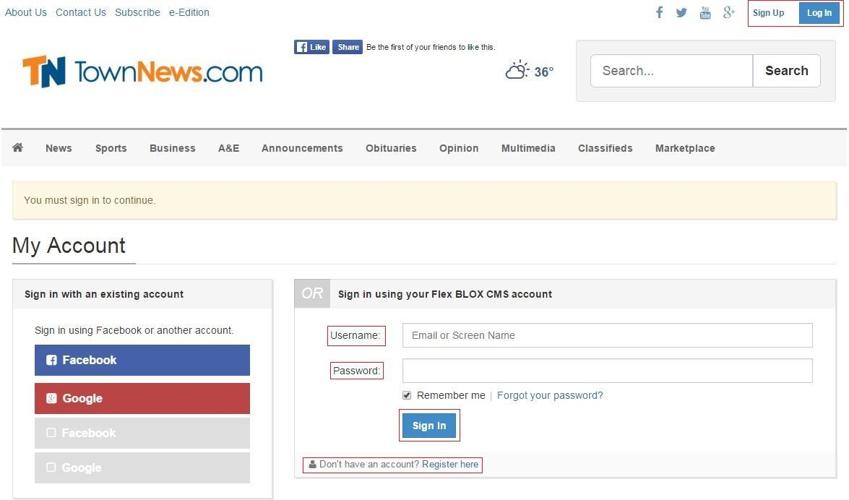
Login
On the front end of the website, there is a Sign Up and a Login button/link. Click on Login and fill in your Account information.
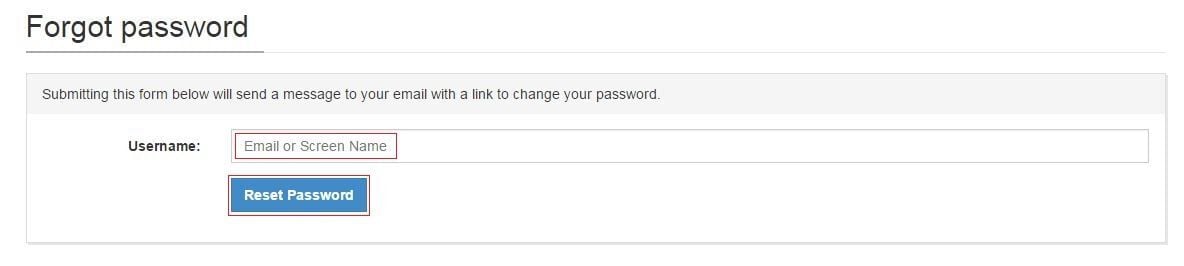
If the user forgets their password, they can select the Reset Password link (shown in the image below). This will take the user to a page where the Screen Name or Email is entered, and Change Password is selected. This will send a message to the email address associated with the user account with a link to reset the password.
Once logged in, your name appears in the upper right corner. Click on it for the User Menu and click on Dashboard.
This takes you directly to the User Dashboard
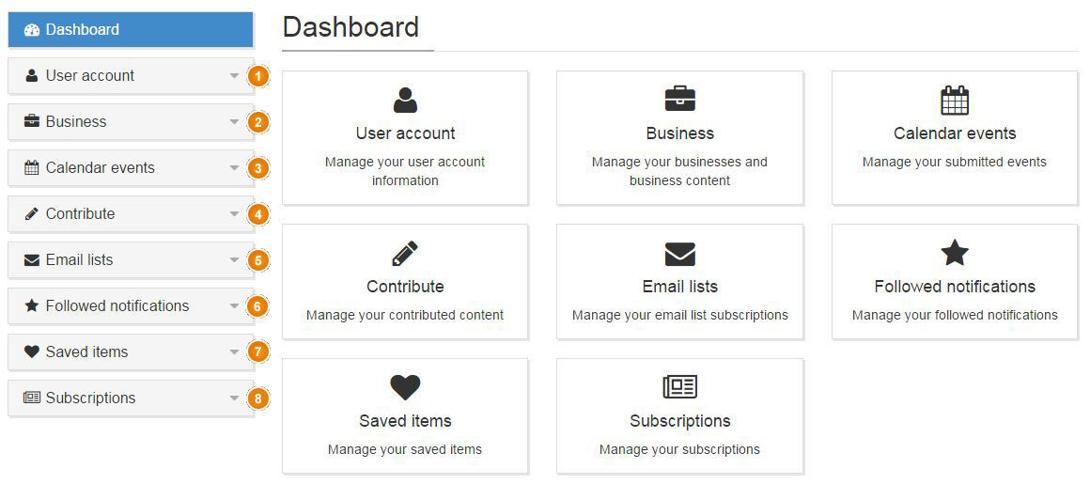
My Dashboard
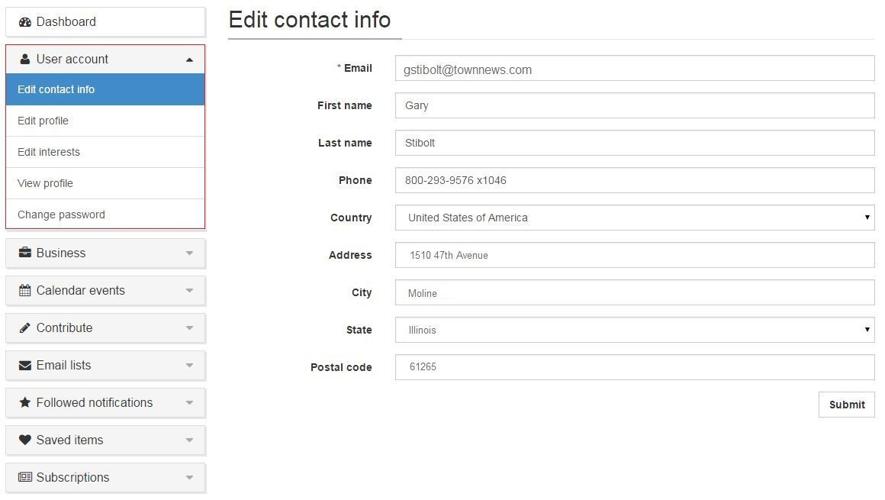
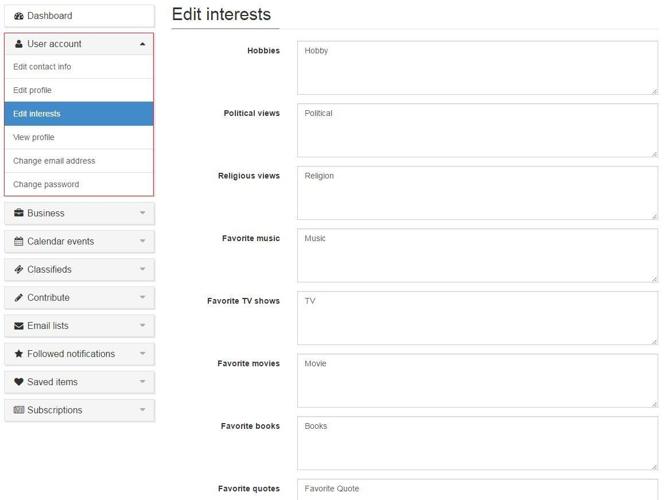
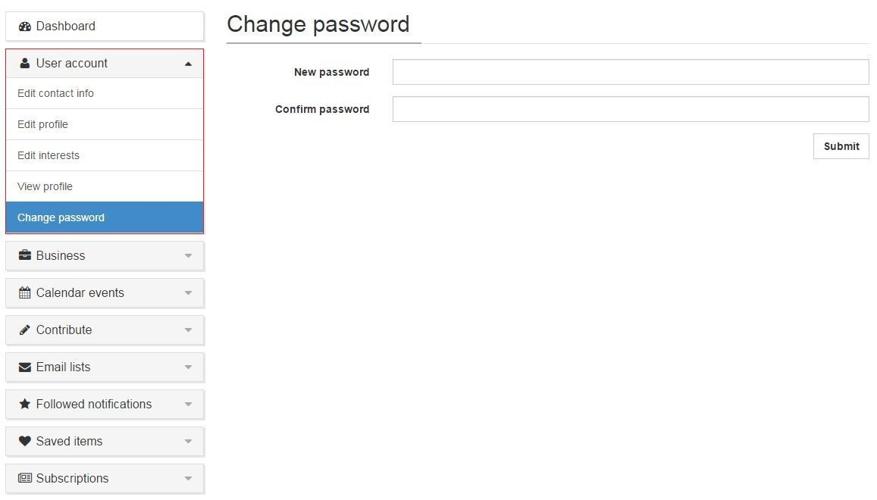
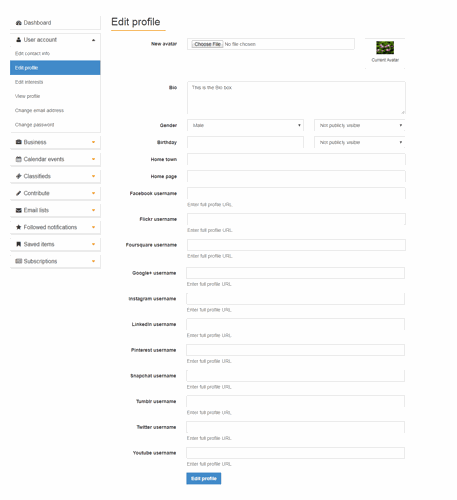
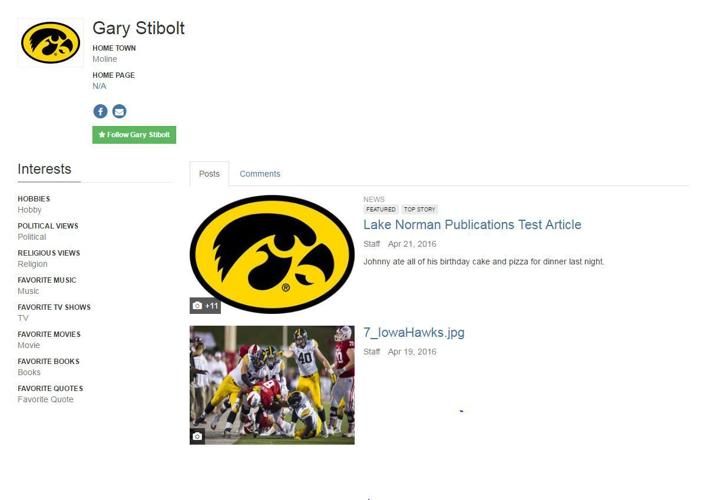
User Account: The user account owner can edit contact info, profile, interests, view profile, and change their password.
Business: Any business that the user is tied to can be managed. The user can manage businesses and submit a business.
Calendar Events: Any events that user created can be managed and create an event.
Contribute: If your site allows User Contributed content, the user account owner can manage the content, create an article, an image, or a YouTube video.
Email Lists: Any Email Lists that set up for the business can be managed here.
Followed Notifications: Any notifications that the user elects to follow can be managed here.
Saved Items: Any Saved Items can be managed here.
Subscriptions: Here, the user account owner can manage all their subscriptions, make a payment, report delivery issues, initiate vacation Stop/Re-Start their deliveries or add a subscription.
Business
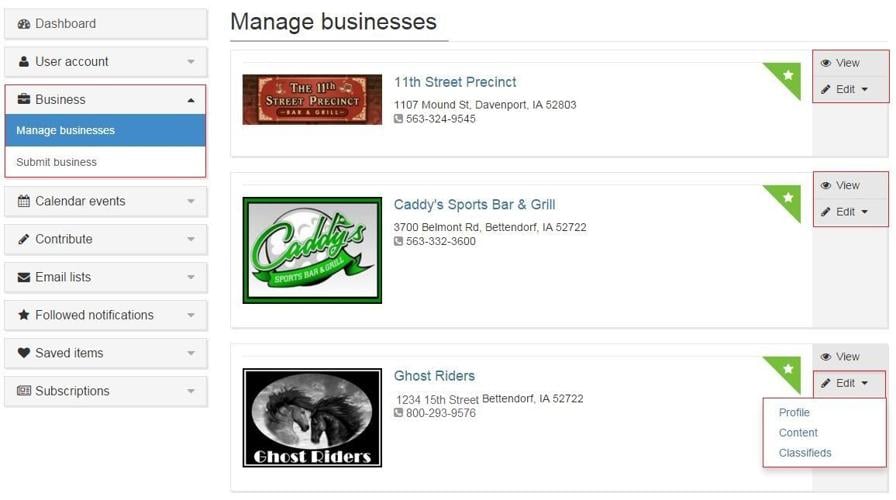
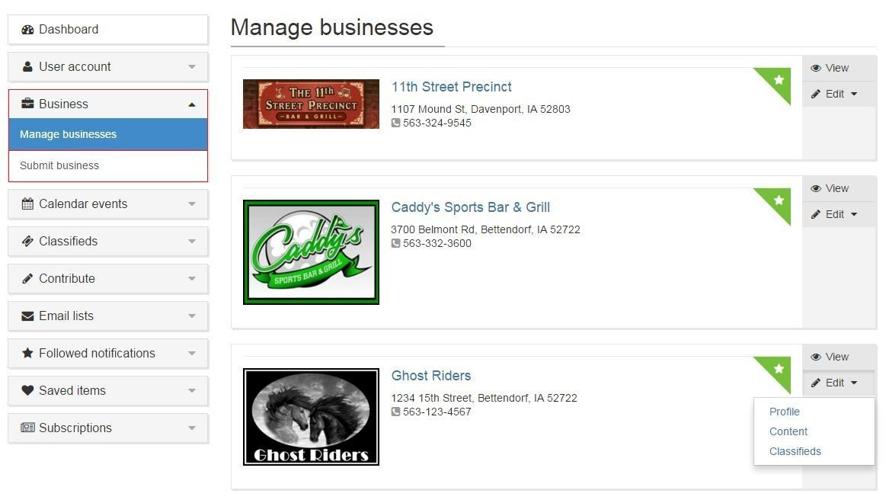
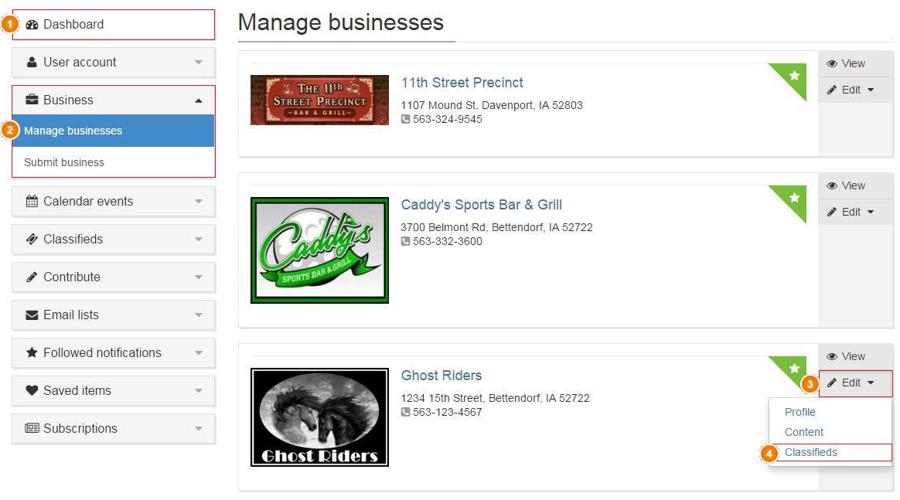
On your Dashboard, click on the menu option "Business." If you own a single business, your business will be listed first. If you own multiple listings, all of your 'Claimed Businesses' will be listed under a heading called Manage Businesses. For each business listed, there is a toolbar on the right with an option to View the listing or to Edit the listing. When you click on Edit, a sub-menu appears with three areas you can work with. You can edit the Business Profile, the Content, and the Classifieds. If a User purchases an Upsell Package, they will have a lot more content options available to them to add and maintain, all of which are listed in this document.
NOTE: This menu option will only appear if you have claimed a business
Profile
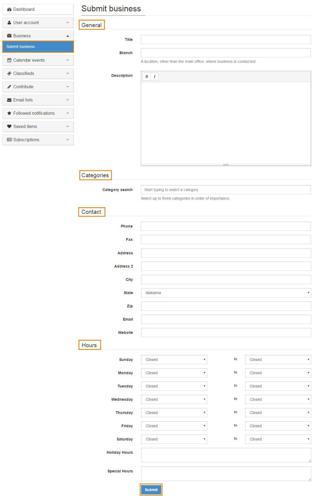
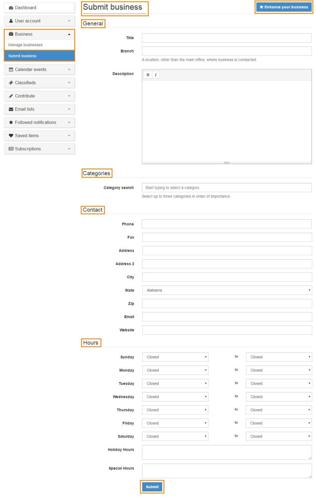
This menu option will allow a User to Edit, Manage any of their Claimed Businesses if they have any. Otherwise, the only option available under the Business section of the User Dashboard is to Submit a Business. The only content you can enter (create) upon submitting a business is:
- General - Title, Branch Location, Description.
- Categories - Select up to three categories. When you enter a keyword, a dropdown list appears for you to select a category from.
- Contact - Basic contact information, phone, fax, address, email, and website URL (must be fully qualified).
- Hours - Set up the hours of operation.
- Submit - Click Submit when done.
Once the the Business has been submitted, you'll get a Pending notice unless new businesses are set to auto-approve in your BLOXCMS Admin. If not, the Site Admin will have to approve. Once approved, you can then Edit the business profile and add additional content.
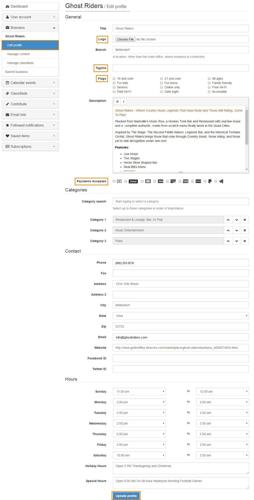
Edit a Profile
Click on Edit Profile and now you can add the following:
- Logo
- Tagline
- Flags
- Payments Accepted
Content
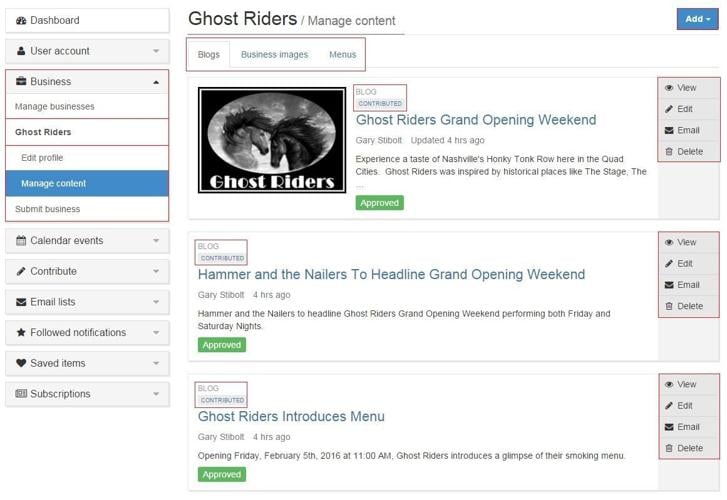
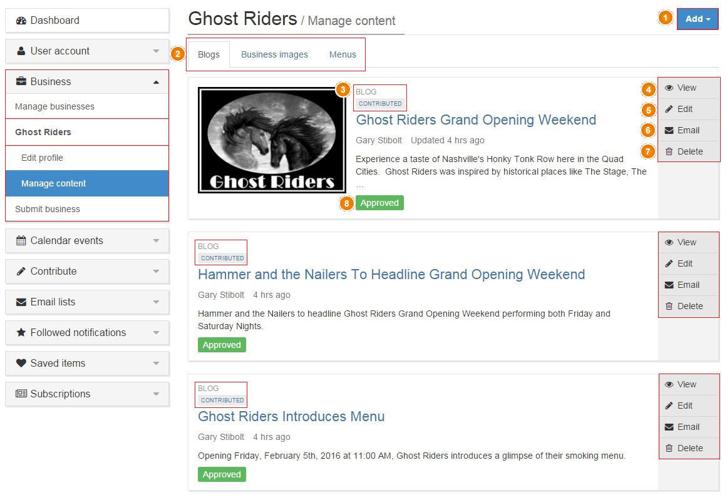
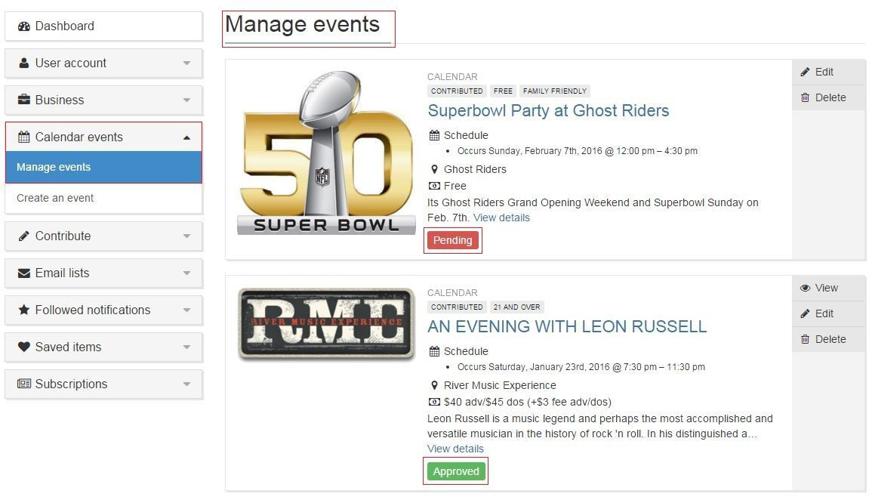
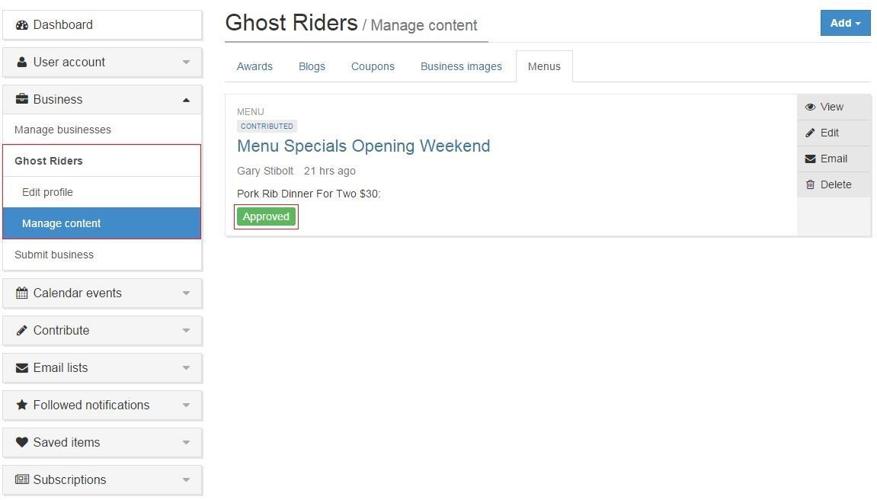
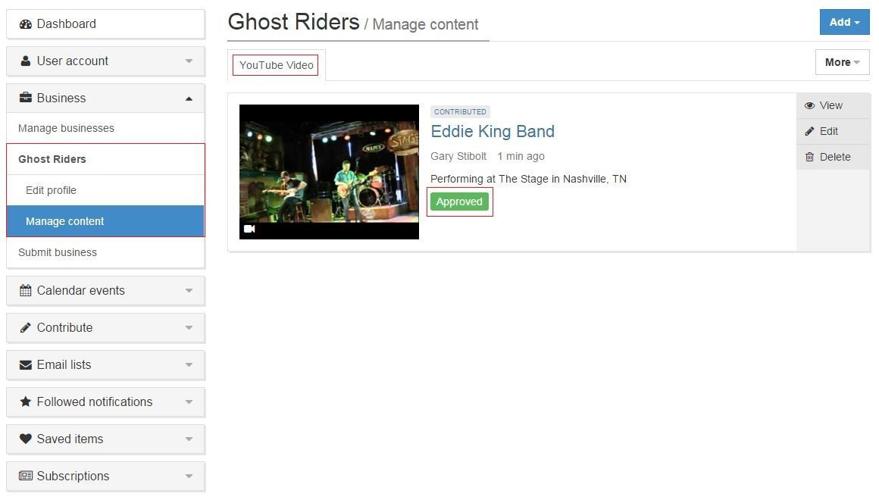
This will load the business and all of the content that has been added up to this point. Notice each content item has a toolbar on the right.
Add: This is a dropdown menu with various types of content that can be added to a business listing.
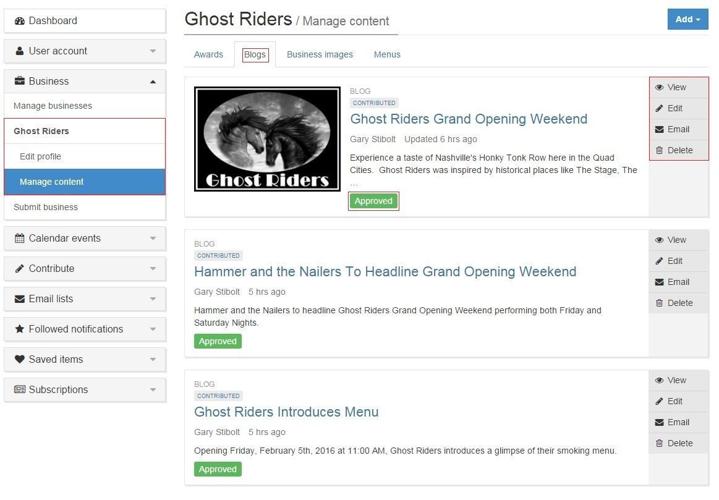
Content Navigation: Any content added to the business will be organized by type. Listed in the image sample are Blogs because that is the content area that was clicked on (by default, when you click on Manage Content, the content type further to the left, will be displayed).
Content Type: This displays what type of content the item is.
View: This toolbar option allows you to view the content item.
Edit: This toolbar option allows you to edit the content item.
Email: This toolbar option allows you to email the content to your users who have set up a user account. They also have to be added to an Email Campaign as a user and the campaign is associated with an Email List in the Email Reach application.
Delete: This toolbar option allows you to delete the content.
Status: This will show either Approved or Pending depending on how the Business Admin Application Settings are set up and/or what action the Administrator has taken on the content being contributed.
NOTE: If your Business Admin Application Settings are set to "Auto-Approve Business-Related Content" all submitted content will be approved. If not, you'll receive a notice stating that it is pending approval.
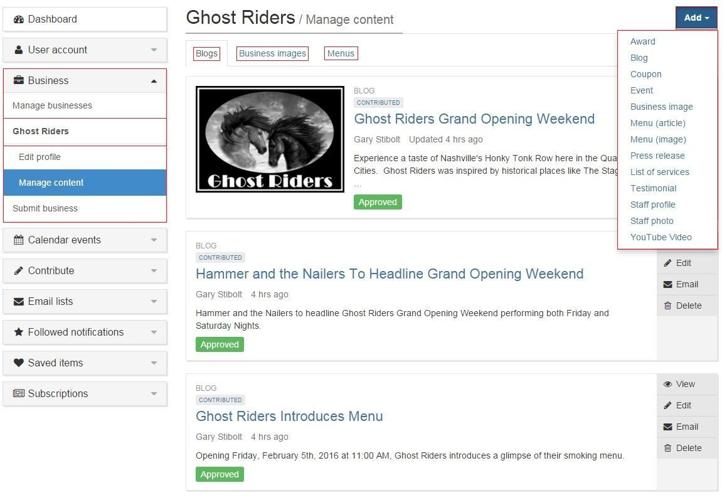
Add
The Add dropdown is a menu of various types of content that can be added to the business listing. All content is organized and displayed on the front end.
Award: Add content for awards the business has won (e.g. Community Awards, Recognition Awards, Contests, etc.)
Blog: Keep any and all Blogs organized here.
Coupon: Add coupons or special offers.
Event: List special community events the business is sponsoring or special promotional events. Events are listed here but are created in under Calendar on the Dashboard.
Business Image: Associate an image with the business. They will be displayed under the Photos content area on the front end.
Menu (Article): Organize Menu's here. You can create promotional menu's, dinner menu's, desert menu's, etc.
Menu (Image): You have the option to add a printed version of the menu. It will be organized here specifically as opposed to other images in the Photo's area on the front end.
Press Release: Organize non-sensitive press releases here.
List of Services: This content is displayed in a specific area on the front end as a part of the page layout.
Testimonial: Testimonials are also displayed in a specific area on the front end as a part of the page layout.
Staff Profile: List all staff members (name, title, etc.) here.
Staff Photo: List all staff members here and use the photo description to enter the staff members name.
YouTube Video: Video content is easily added and is displayed in a specific area on the front end as a part of the page layout.
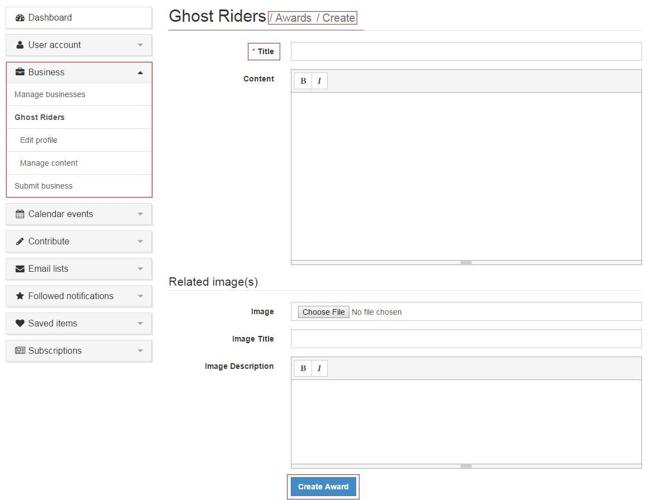
Award
Select Award from the Add menu and it opens the create window to add an Award. Title is a required field. If you add an image, the Image Title becomes required. It does not display on the front end, it's only seen in the Dashboard. When done adding Award content, click on Create Award button at the bottom.
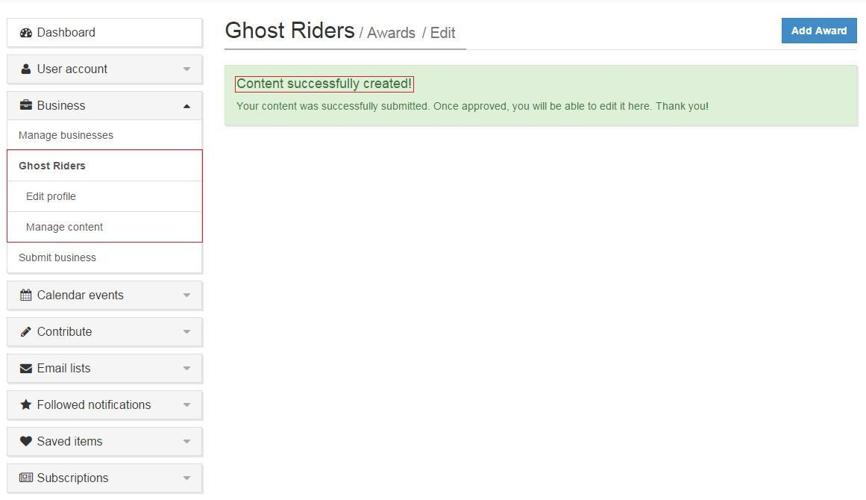
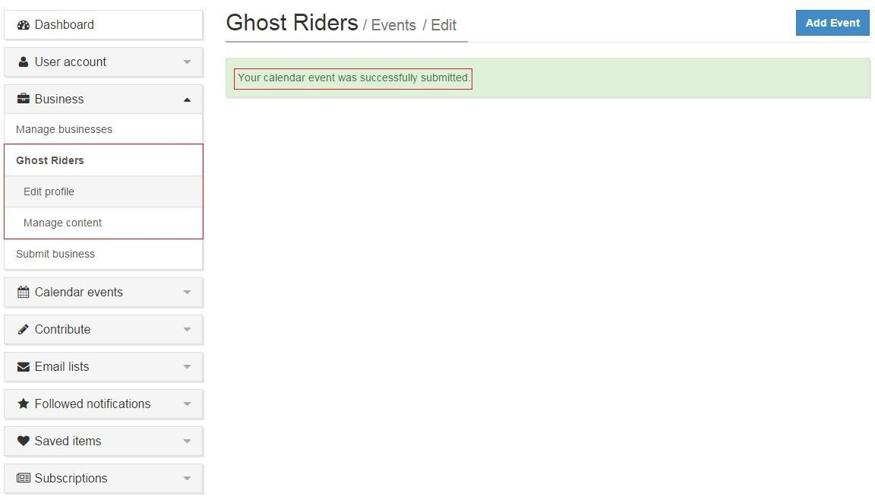
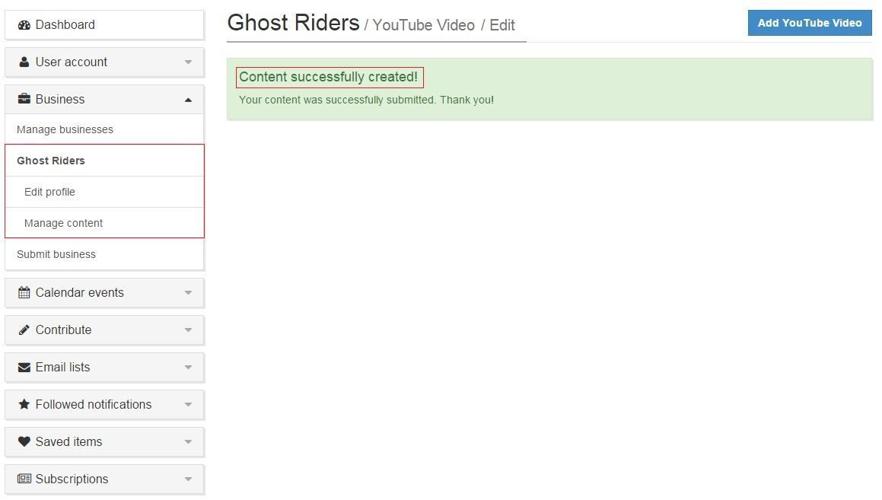
You'll get a Successful message once complete. To verify if it was approved or not, on the left menu, click on Manage Content under business name.
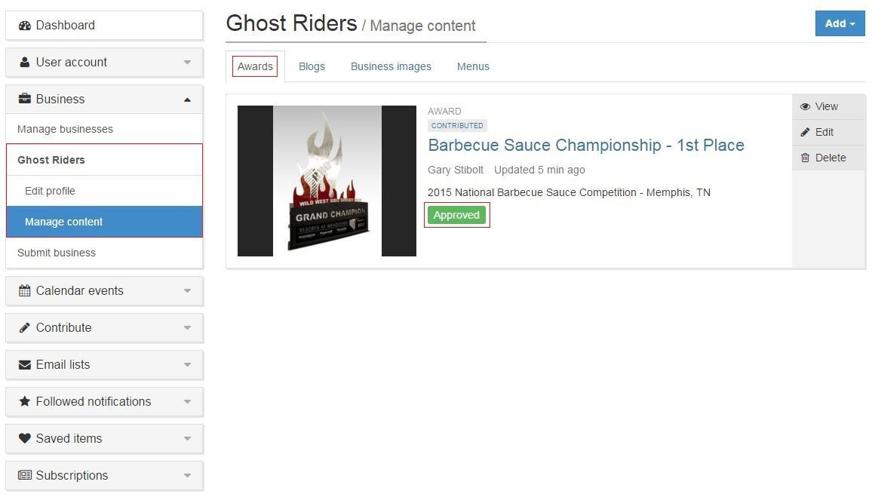
If it's not there, navigate to the content area and click on it. You'll see the Award content listed and Approved or Pending status will be listed under the description.
Blog
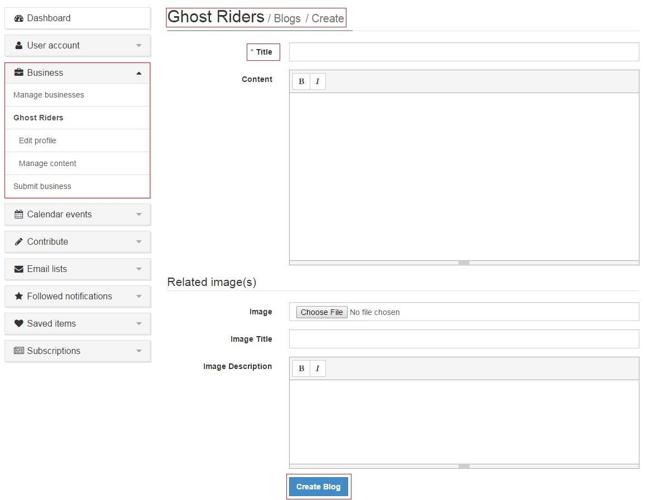
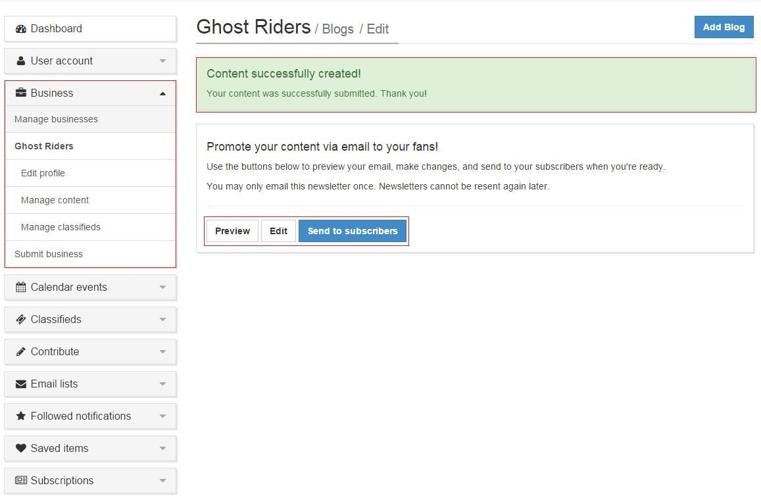
Select Blog from the Add menu and it opens the create window to add a Blog. The Title field is required. If you add an image, the Image Title becomes required. It does not display on the front end, it's only seen in the Dashboard. When done adding the Blog, click on Create Blog button at the bottom.
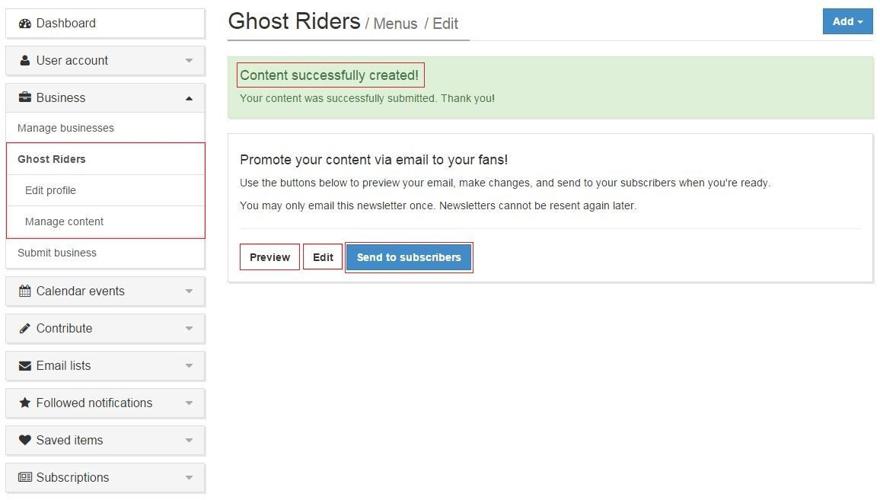
You'll get a Successful message once complete. Here you now get the option to Send the Menu (via email) to your fans. You can also Preview and/or Edit the Menu (Image). You can only use this feature if you have an Email List set up in Email Reach and set up an Email Campaign for it with your Users associated with the Email Campaign.
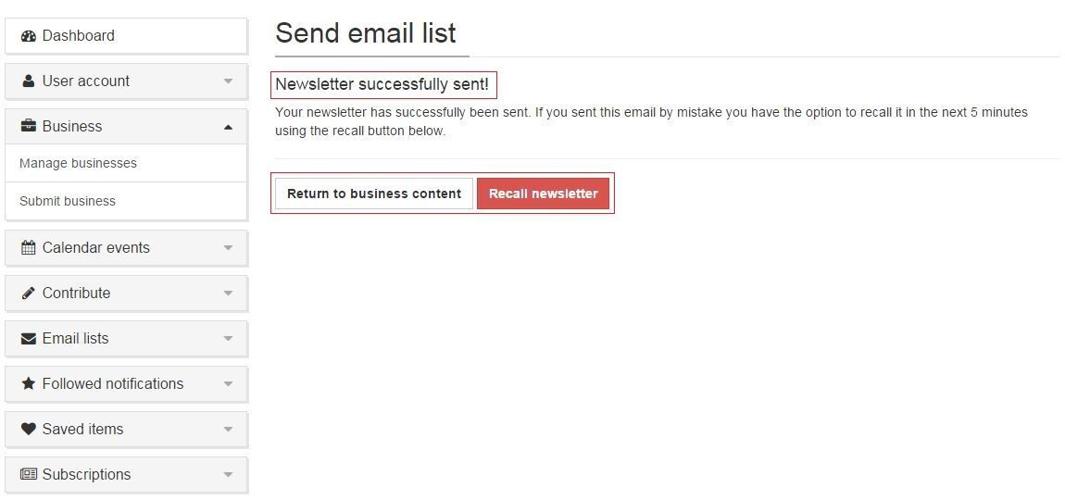
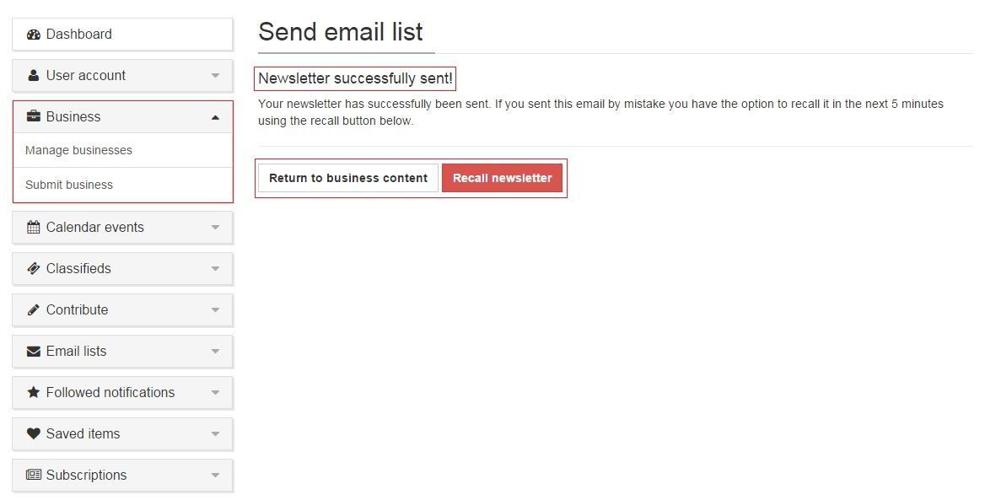
If the Email List is set up, then you will get a Newsletter Successfully Sent message. You then have the option to Return To Business Content or Recall Newsletter.
NOTE: When you send content via email, BLOXCMS actually schedules the Send Action to take place within 10 minutes (verify in Community / Email Reach) of submission. You have five minutes to recall the Newsletter from being sent.
Coupon
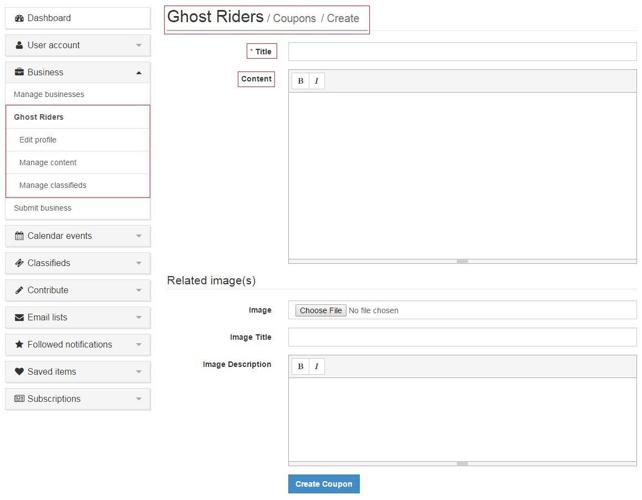
Select Coupon from the Add menu and it opens the create window to add a Coupon. The Title field is required. If you add an image, the Image Title becomes required. It does not display on the front end, it's only seen in the Dashboard. When done adding the Coupon, click on Create Coupon button at the bottom.
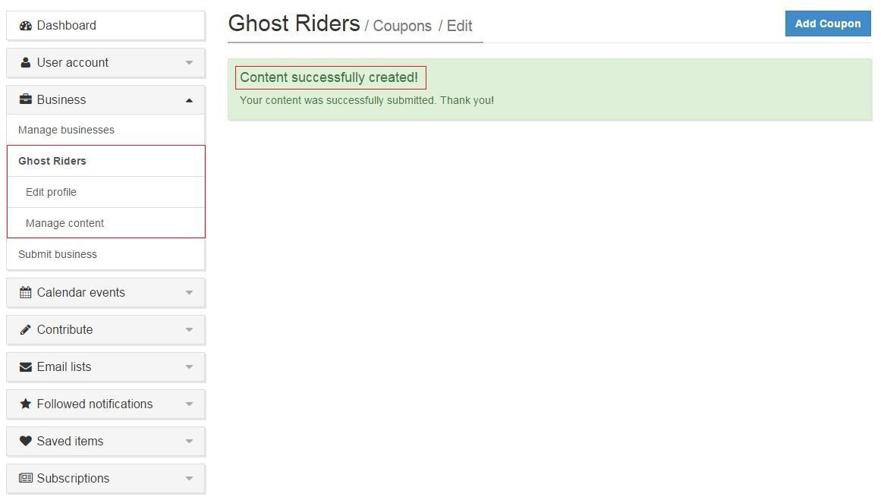
You'll get a Successful message once complete. To verify if it was approved or not, on the left menu, click on Manage Content under business name.
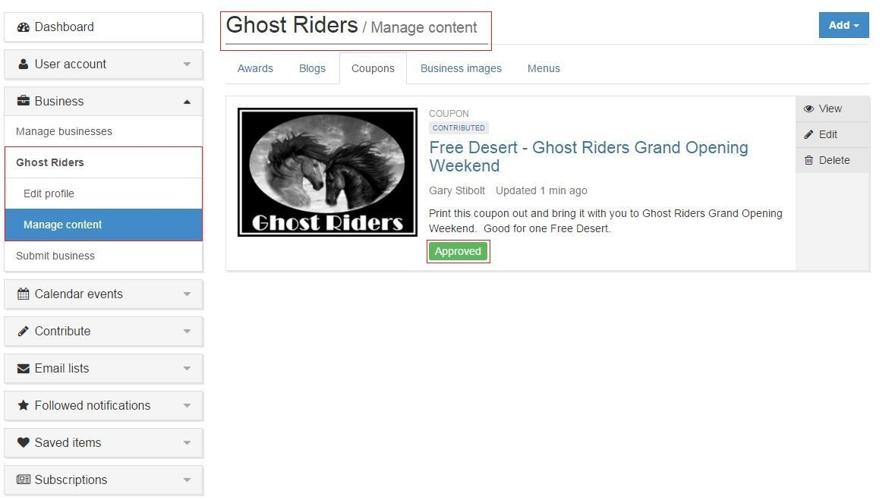
If it's not there, navigate to the content area and click on it. You'll see the Coupon content listed and Approved or Pending status will be listed under the description.
Event
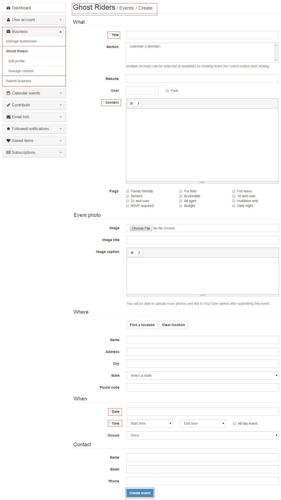
Select Event from the Add menu and it opens the create window to add an Event. The Title field is required. If you add an image, the Image Title becomes required. It does not display on the front end, it's only seen in the Dashboard. When done adding the Event, click on Create Event button at the bottom.
NOTE: You can manage this event from this business listing in the Dashboard and in the Calendar section of the Dashboard. Any Event that has expired will no longer show in the business Events listings.
NOTE: If the Venue listed is a business listed in your Business Directory, it will show up on that Businesses Listing under a sub-header called "Events Here. If the Business is not the Venue but is related to the Event, the Event will be listed on the Business Listing as a Sponsored Event."
NOTE: Any Calendar Event that is related to a Featured Business Listing will show as a link on the Business Listing when that business shows up as a part of a Business Search.
NOTE: When you enter the WHERE information, you can click on Find a Location and it will open up a Search window of the Business Directory. By default, all Featured Businesses will be listed. You can search by keyword and click Update to get more accurate results to your search. When you click on the Add button for a business, the window closes and the information will be populated in the WHERE fields automatically. If it's not correct, you can click Clear Location and the fields will be deleted and you can try again or fill the fields in manually.
You'll get a Successful message once complete. To verify if it was approved or not, on the left menu, click on Manage Content under business name.
If it's not there, navigate to the content area and click on it. You'll see the Event content listed and Approved or Pending status will be listed under the description.
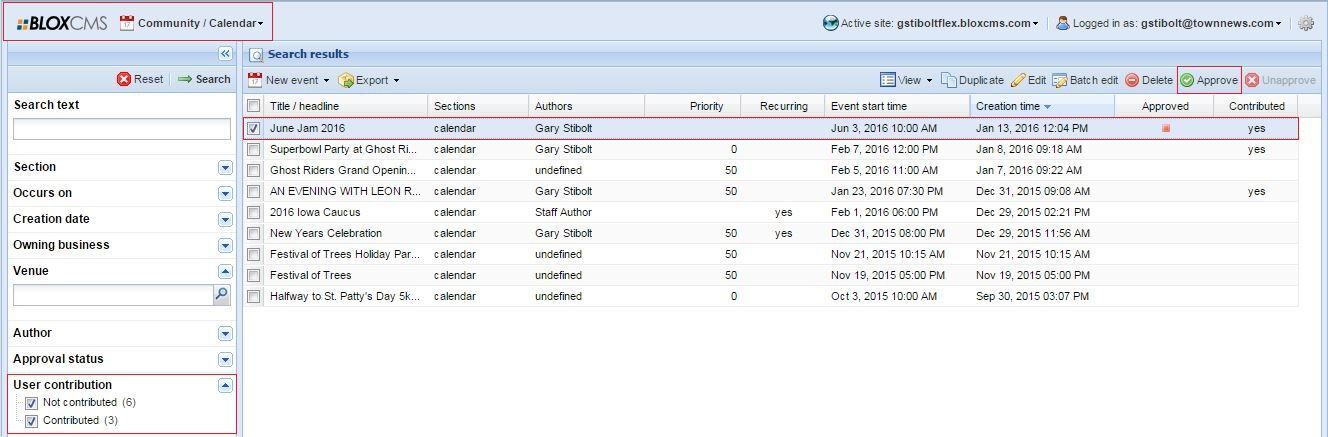
To approve, the Site Admin will need to log into BLOXCMS Admin (Desktop / Community / Calendar) and search for the new business and select it and then click on Approve on the Toolbar above it. A confirmation window will appear, click Okay.
NOTE: Once the event has been approved the event can be found in the site calendar and under the Events marketplace profile tab for the owning business from where the event was created.
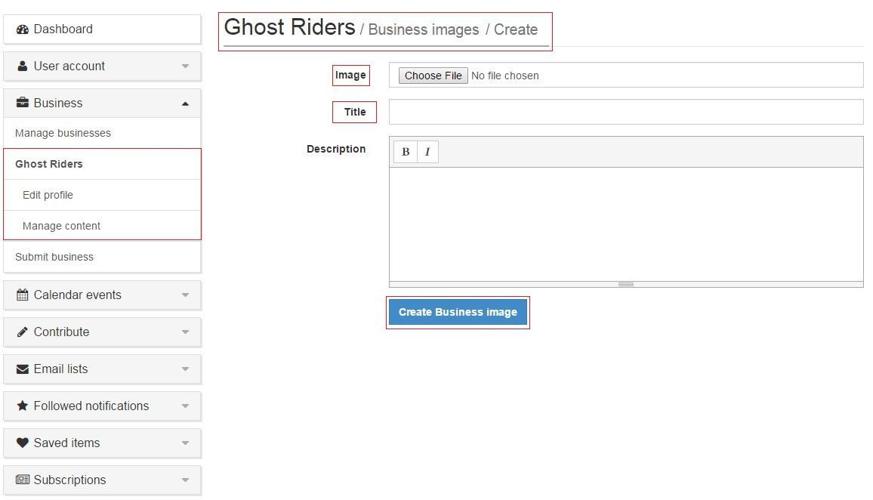
Business Image
Select Business Image from the Add menu and it opens the create window to add an Business Image. The Title field is required. It does not display on the front end, it's only seen in the Dashboard, however, the Description will be visible on the front end. When done adding the Business Image, click on Create Business Image button at the bottom.
You'll get a Successful message once complete. To verify if it was approved or not, on the left menu, click on Manage Content under business name.
If it's not there, navigate to the content area and click on it. You'll see the Business Image content listed and Approved or Pending status will be listed under the description.
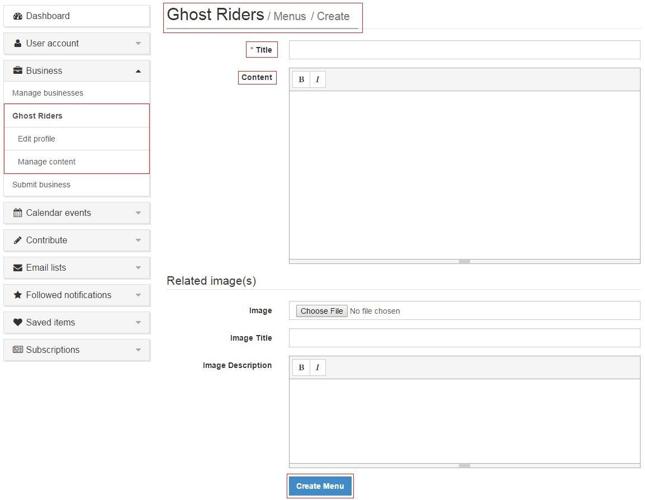
Menu (Article)
Select Menu (Article) from the Add menu and it opens the create window to add a Menu (Article). The Title field is required. If you add an image, the Image Title becomes required. It does not display on the front end, it's only seen in the Dashboard. When done adding the Menu (Article), click on Create Menu button at the bottom.
You'll get a Successful message once complete. To verify if it was approved or not, on the left menu, click on Manage Content under business name.
If it's not there, navigate to the content area and click on it. You'll see the Menu (Article) content listed and Approved or Pending status will be listed under the description.
Menu (Image)
Select Menu (Image) from the Add menu and it opens the create window to add a Menu (Image). The Title field is required. It does not display on the front end, it's only seen in the Dashboard, however, the Description is visible on the front end. When done adding the Menu (Image), click on Create Menu button at the bottom.
You'll get a Successful message once complete. Here you now get the option to send the menu (via email) to your fans. You can also Preview and/or Edit the Menu (Image). You can only use this feature if you have an Email List set up in Email Reach and set up an Email Campaign for it with your Users associated with the Email Campaign.
If the Email List is set up, then you will get a Newsletter Successfully Sent message. You then have the option to Return To Business Content or Recall Newsletter.
NOTE: When you send content via email, BLOXCMS actually schedules the Send Action to take place within 10 minutes (verify in Community / Email Reach) of submission. You have five minutes to recall the Newsletter from being sent.
Press Release
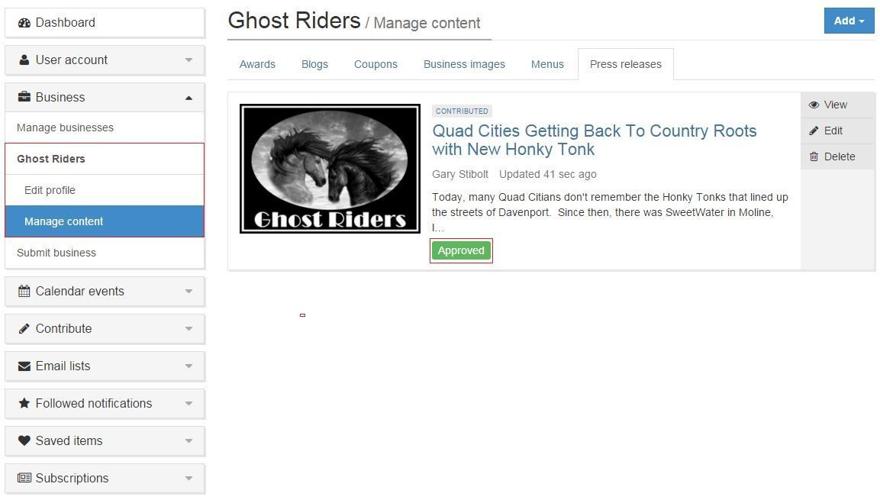
Select Press Release from the Add menu and it opens the create window to add a Press Release. The Title field is required. If you add an image, the Image Title becomes required. It does not display on the front end, it's only seen in the Dashboard. When done adding the Press Release, click on Create Press Release button at the bottom.
You'll get a Successful message once complete. To verify if it was approved or not, on the left menu, click on Manage Content under business name.
If it's not there, navigate to the content area and click on it. You'll see the Press Release content listed and Approved or Pending status will be listed under the description.
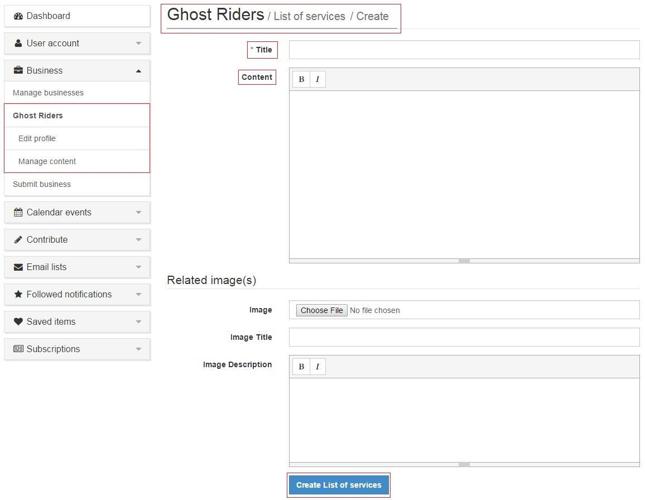
List of Services
Select List of Services from the Add menu and it opens the create window to add a List of Services. The Title field is required. If you add an image, the Image Title becomes required. It does not display on the front end, it's only seen in the Dashboard. When done adding the List of Services, click on Create List of Services button at the bottom.
You'll get a Successful message once complete. To verify if it was approved or not, on the left menu, click on Manage Content under business name.
If it's not there, navigate to the content area and click on it. You'll see the List of Services content listed and Approved or Pending status will be listed under the description.
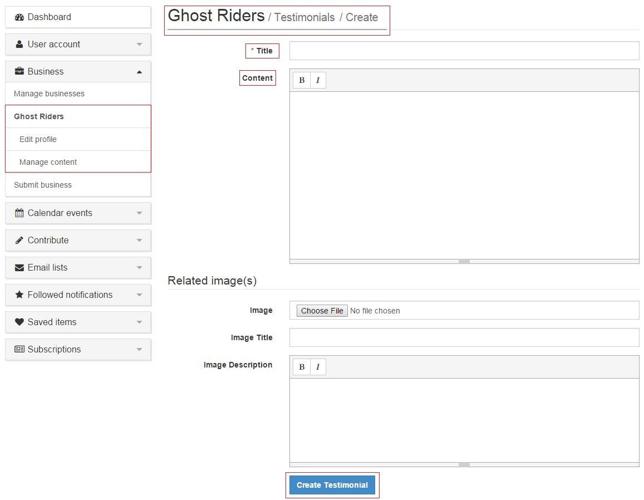
Testimonial
Select Testimonial from the Add menu and it opens the create window to add a Testimonial. The Title field is required. If you add an image, the Image Title becomes required. It does not display on the front end, it's only seen in the Dashboard. When done adding the Testimonial, click on Create Testimonial button at the bottom.
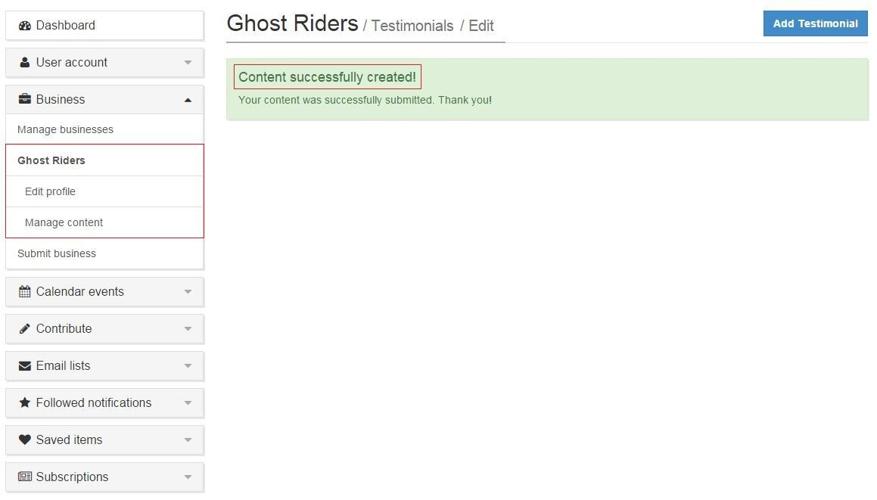
You'll get a Successful message once complete. To verify if it was approved or not, on the left menu, click on Manage Content under business name.
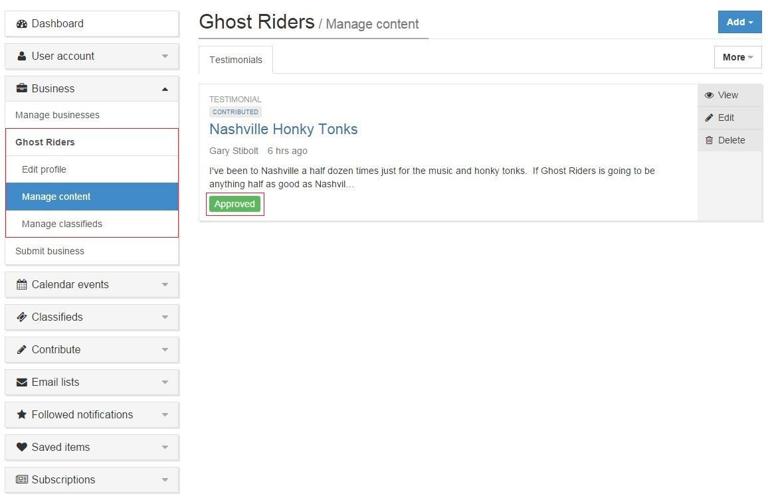
If it's not there, navigate to the content area and click on it. You'll see the Testimonial content listed and Approved or Pending status will be listed under the description.
Staff Profile
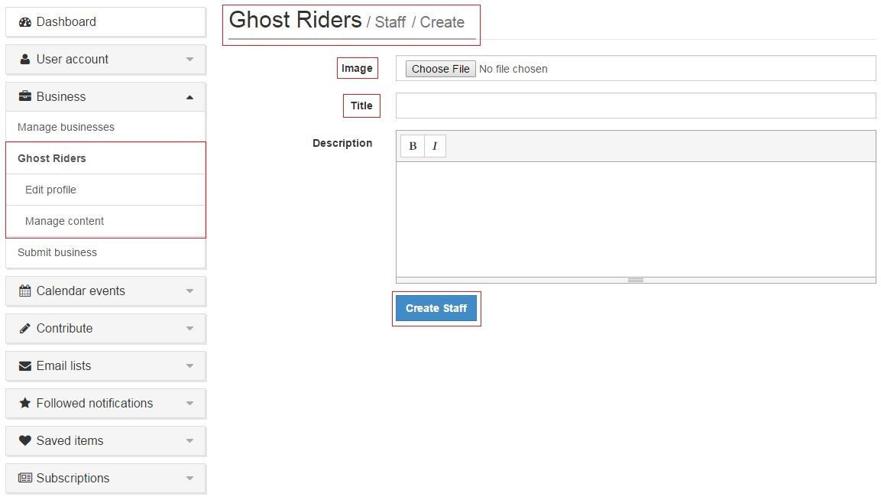
Select Staff Profile from the Add menu and it opens the create window to add a Staff Profile. The Title field is required. If you add an image, the Image Title becomes required. It does not display on the front end, it's only seen in the Dashboard. When done adding the Staff Profile, click on Create Staff button at the bottom.
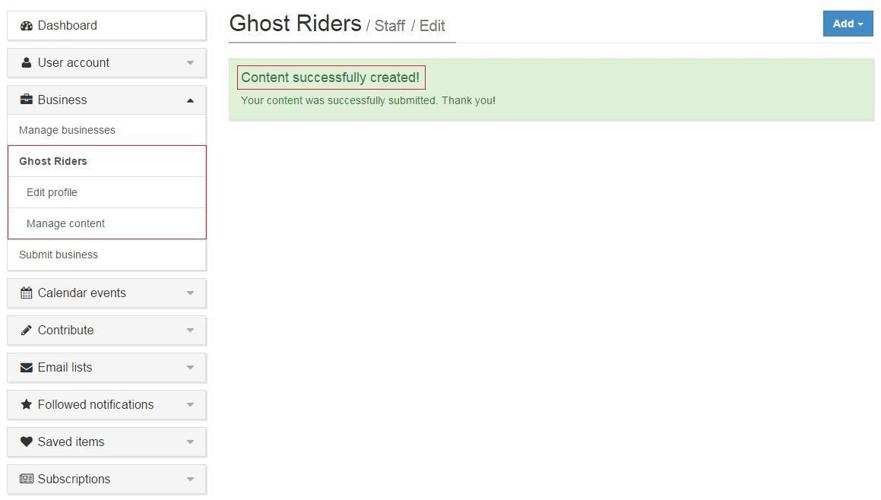
You'll get a Successful message once complete. To verify if it was approved or not, on the left menu, click on Manage Content under business name.
If it's not there, navigate to the content area and click on it. You'll see the Staff Profile content listed and Approved or Pending status will be listed under the description.
Staff Photo
Select Staff Photo from the Add menu and it opens the create window to add a Staff Photo. The Title field is required. If you add an image, the Image Title becomes required. It does not display on the front end, it's only seen in the Dashboard. When done adding the Staff Photo, click on Create Staff button at the bottom.
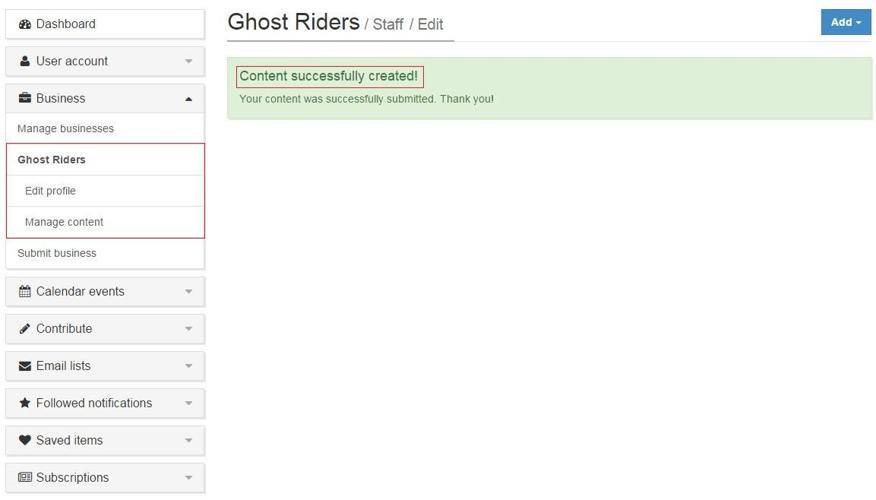
You'll get a Successful message once complete. To verify if it was approved or not, on the left menu, click on Manage Content under business name.
If it's not there, navigate to the content area and click on it. You'll see the Staff Photo content listed and Approved or Pending status will be listed under the description.
YouTube Video
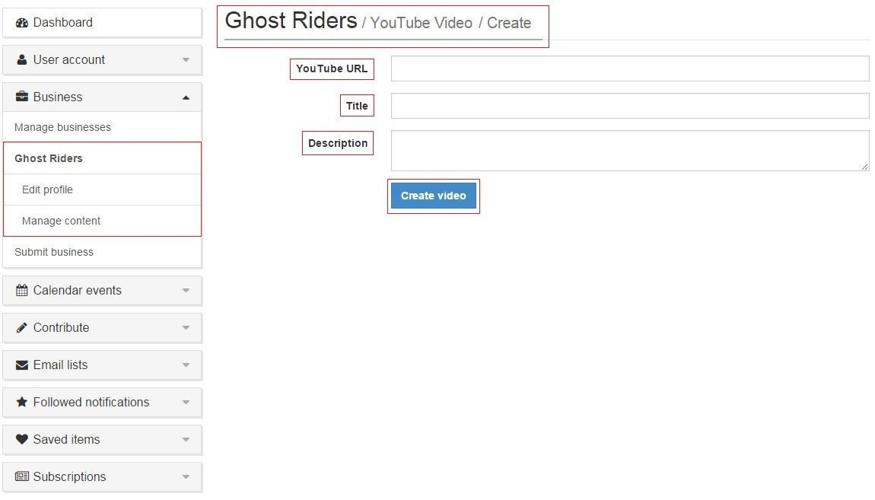
Select YouTube Video from the Add menu and it opens the create window to add a YouTube Video. The Title field is required and it display's on the front end on the thumb view of the video. A Description is optional. When done adding the YouTube Video, click on Create Video button at the bottom.
You'll get a Successful message once complete. To verify if it was approved or not, on the left menu, click on Manage Content under business name.
If it's not there, navigate to the content area and click on it. You'll see the YouTube Video content listed and Approved or Pending status will be listed under the description.
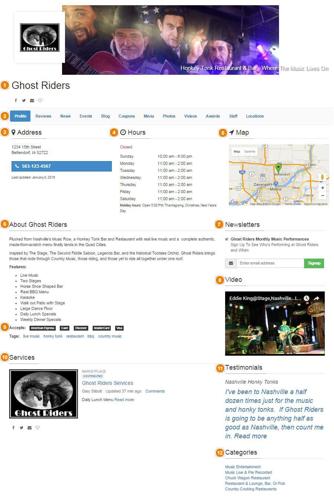
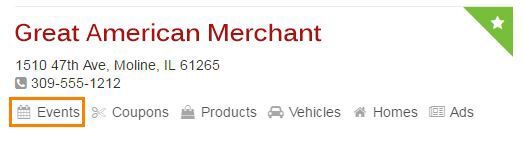
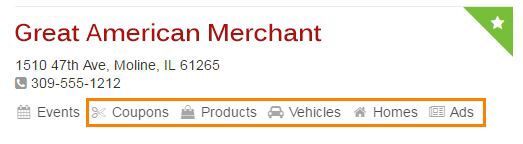
Front End
Business Name: Title of the business assigned when setting up the new business listing.
Content Menu: All the content added is organized using a menu. In BLOXCMS Admin, you'll find all this content in the Related as Child Assets, Calendar: Events, etc.
Address: Address and phone number displayed on the left side under the content menu.
Hours: Hours listed as entered on the Dashboard. Also found in BloxCMS Admin under Other in Business Hours.
Map: Map is generated automatically on the backend from address information entered in the Dashboard. Also, found under Other | Location in BloxCMS Admin.
Description: Spans the left two columns as entered in the Dashboard.
Newsletters: This is created in Email Reach. Adding an Email List, assigning an Email Campaign to it and associating User Accounts email address to the Email Campaign which is linked to the Email List.
YouTube Video: If there are multiple YouTube Videos, they'll be listed under the Videos link in the Content Menu towards the top.
Payment Methods: Payment Methods are selected in the Edit Profile portion of the Dashboard and displayed just under the Business Description.
List of Services: List of Services will be displayed lower left by default.
YouTube Video: Testimonials are displayed under Videos by default on the right side.
Categories: These cannot be added via the Dashboard. They have to be added in BLOXCMS Admin / Marketplace / Businesses. Pull up the business listing and under Tags on the right, click on Categories, then Add.
Classifieds
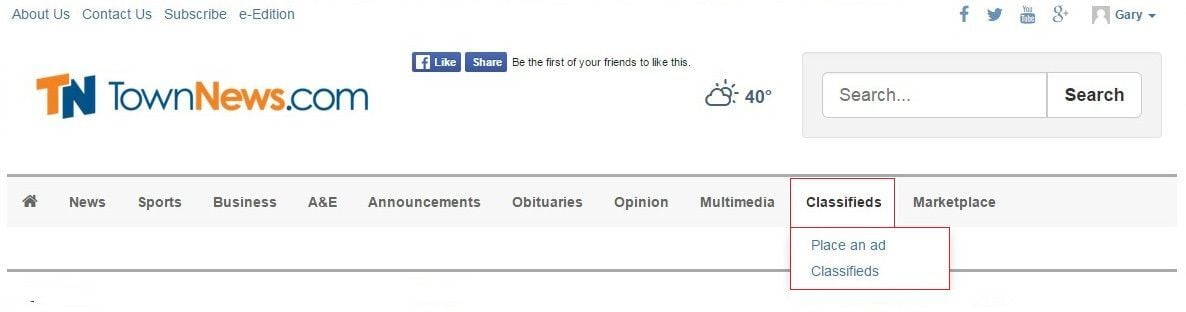
Classifieds are not part of the Business Content Add Menu but you can associate a Classified Ad to a Business. To access/manage Classifieds for the Business, do the following:
- On your User Dashboard, click on Classifieds to expand the menu.
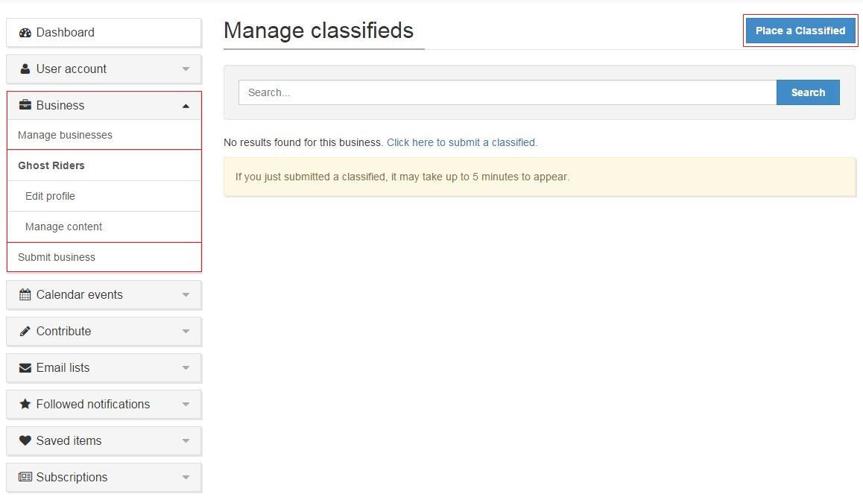
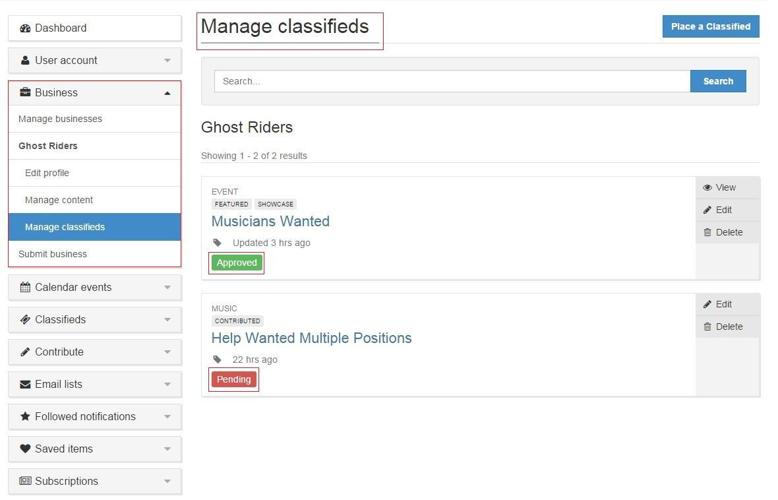
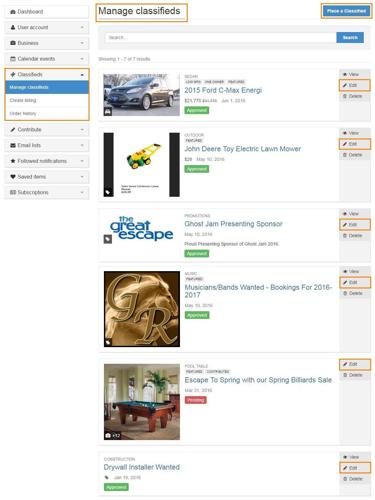
- Click on Manage Classifieds.
- Any Classified Ad that is associated for a particular business, will be listed.
- At this point, you can click on Edit to update the Ad or click on Place a Classified in the upper right corner of the Dashboard. You can also Delete an Ad.
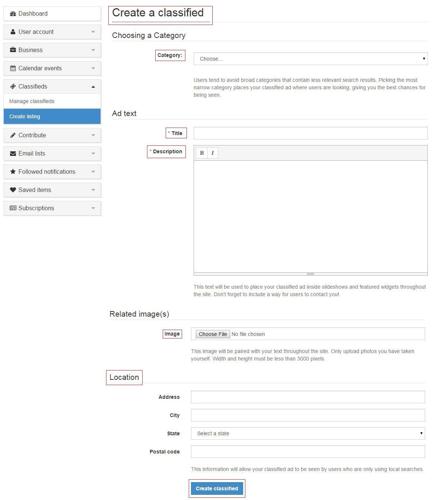
The Create a Classified page loads. Fill in the desired fields. Ad Text Title and Description are required fields. Click on the Create Classified button at the bottom when you're done.
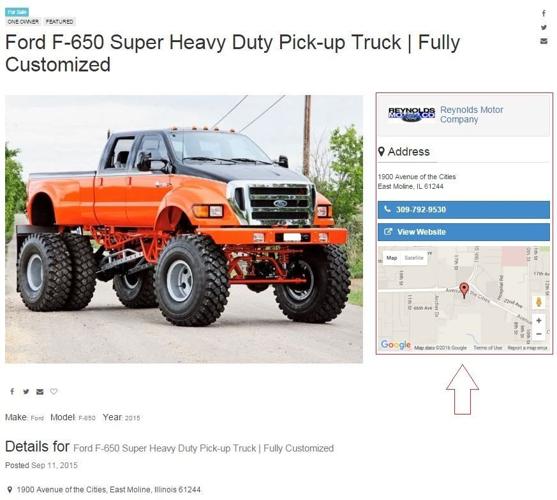
Best Practice: If you are placing a Classified Ad for a Home, use the Address as the Title - For an Automobile/Recreational Vehicle, use the Year/Make/Model as the Title - for Commercial Property, use a descriptive word (e.g. Office Building) with the address.
Note: If a Classified Ad is associated with a Business that has Address information and/or Longitude/Latitude cooridinates, a Map will appear to the right of the Ad.
NOTE: Any Classified Ad that is related to a Featured Business Listing will show as a link on the Business Listing when that business shows up as a part of a Business Search.
The Classified Ad submission is considered User Contributed so a Pending or Approval status will be associated with the Ad posting depending on how the Application Settings are set (Auto-Approve or Not) on the Admin side.
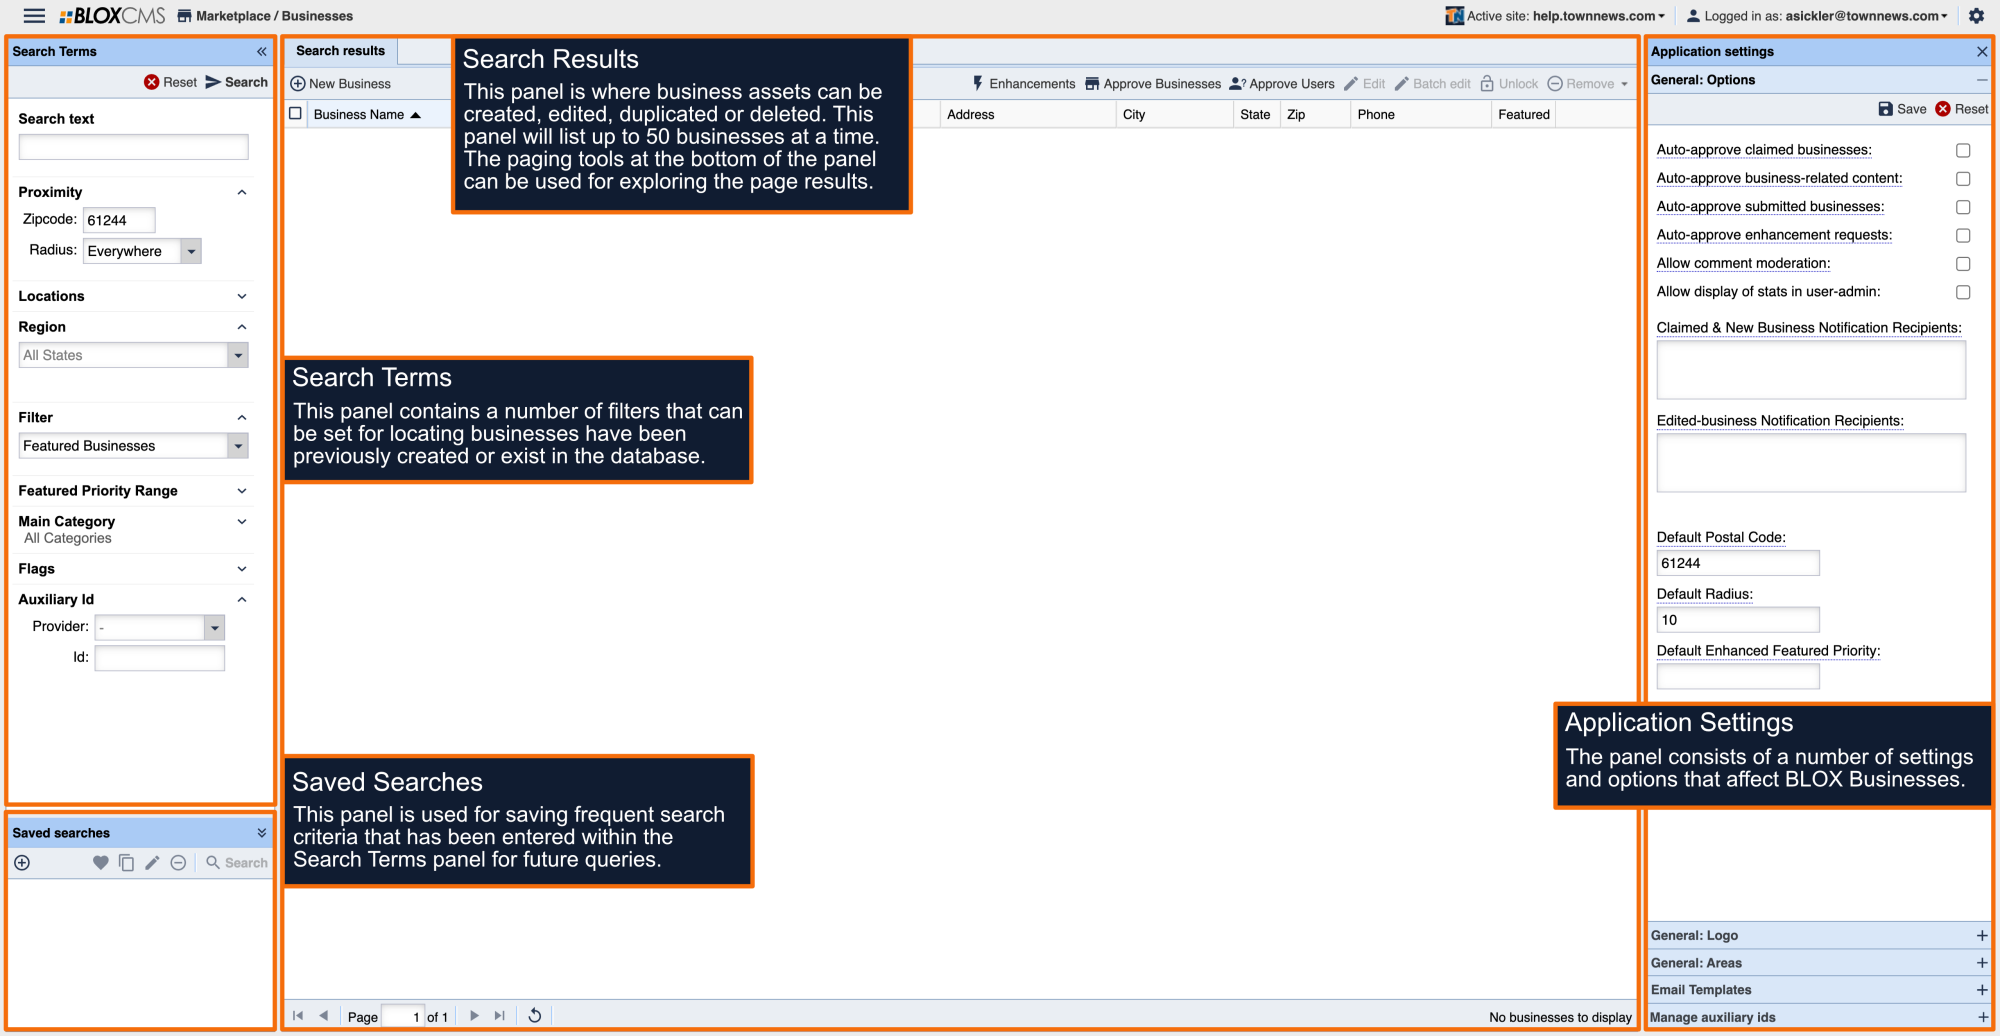
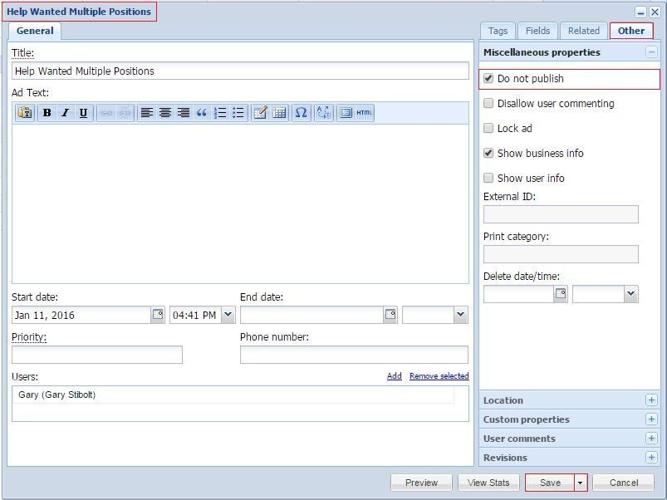
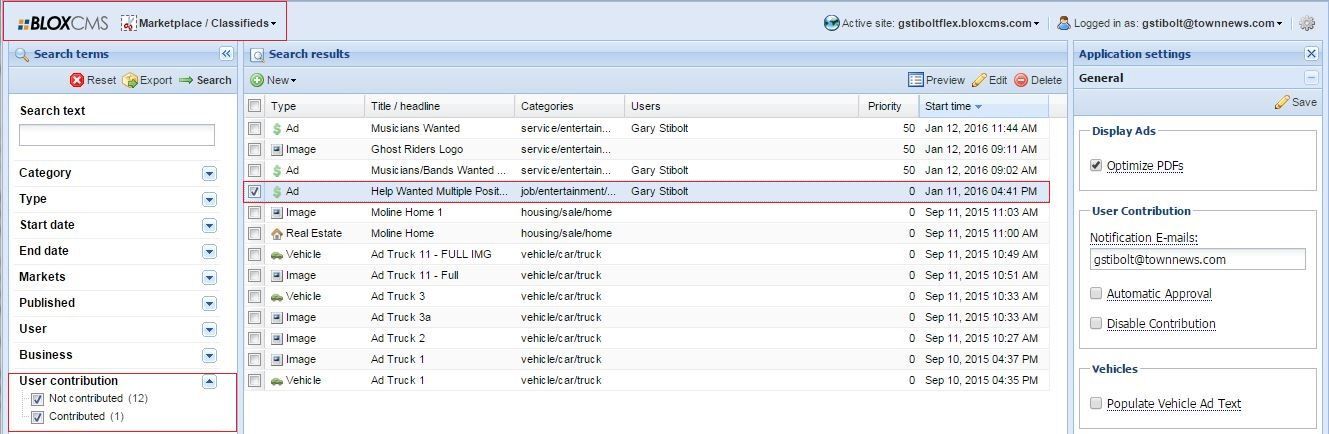
If manual approval is required, BLOXCMS Admin will have to approve. Go to BLOXCMS Desktop / Marketplace / Classifieds. Make sure on the left Search Terms that User Contributed is checked so the Search Results pull in the User Contributed Classified Ad.
Open the Classified Ad, review it. To Approve, under Other, uncheck Do Not Publish and Save.
NOTE: Classified Ads will not populate onto the Business Section of the User Dashboard. You must go to Classifieds to see the Ad (which is still part of the User Dashboard).
Submit Business
To submit a new business listing, on your Dashboard, under Business, select Submit Business. The Submit Business option is a default setting even if you haven't already claimed a business. If you have other claimed businesses, the Manage Business option will be available.
NOTE: The option to Enhance Your Business is not active until your business has been approved.
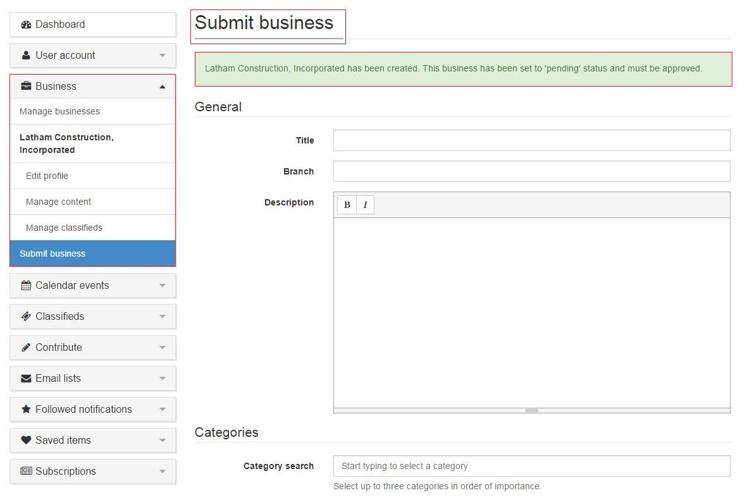
This will load the Submit Business page. Fill in all the applicable fields and click on Submit at the bottom when done.
Once submitted, you'll receive a confirmation message stating the business has been set to Pending status.
NOTE: If you add a business that is already in the business directory, it will produce a duplicate entry.
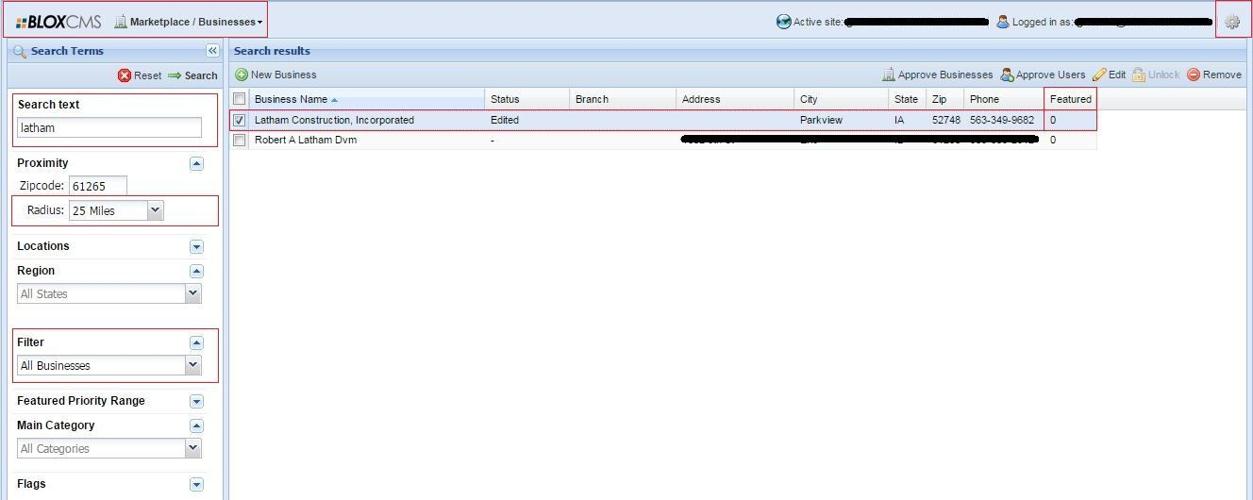
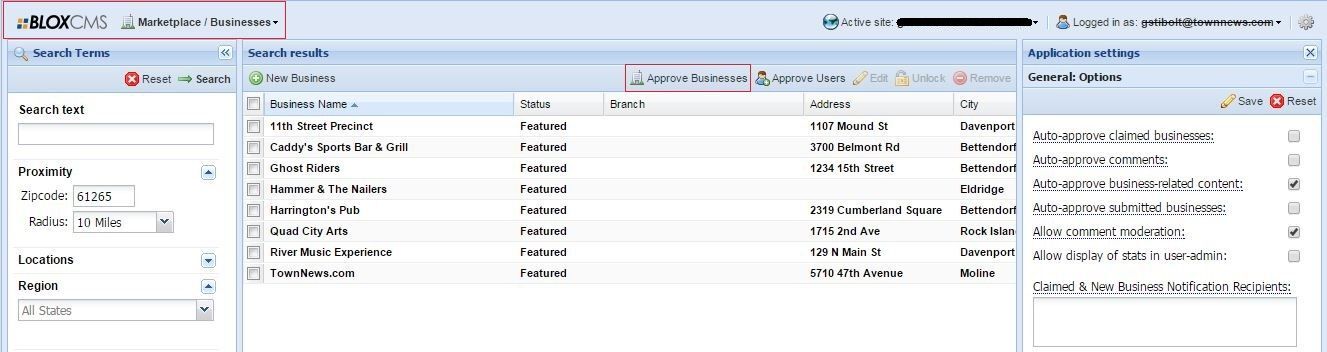
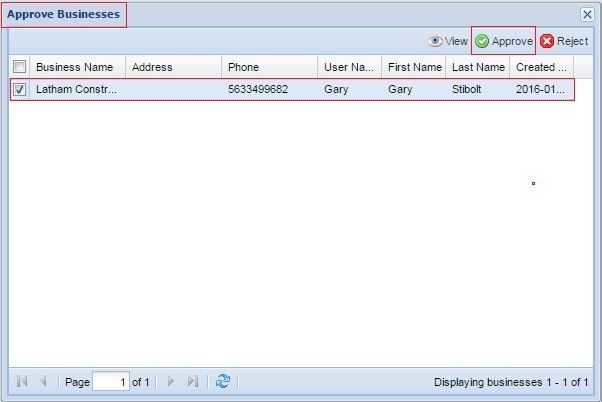
The Site Admin needs to log into the BLOXCMS Business Admin (Desktop / Marketplace / Businesses) and click on the Approve Businesses button on the Toolbar.
This opens the Approve Businesses window. Select the business (or others) that needs to be approved and click on the Approve button on the Toolbar. It will be removed from the window immediately.
Now that it's approved, you can further review for edits. You can refresh the Business Admin screen. By default, the business listing will have a priority of zero. Double check your Search Terms, such as Mile Radius, Featured Business, All Businesses, or use a Text word, etc. then click on Search. The business you just approved should appear in the Search Results list.
NOTE: You will see the business listed in Manage Businesses on the Dashboard. You'll see an Edit button on the right, but if its not approved yet, you won't be able to access the business listing for editing.