Overview
BLOX integrates with Facebook Commenting and allows your readers to comment using their Facebook Profile. These comments are not moderated within BLOX CMS and are instead moderated using Facebook's Moderation Tool. Each asset you allow User Comments on, will have a Comment Section at the bottom of the Asset Page. Each Comment Section will have a link at the top of it that says Moderation Tool. That link opens into a new browser window where you will manage/moderate the comments. Facebook Comment Moderation is a Facebook product that BLOX supports.
Create a Facebook Account
If you do not already have a Facebook account, go to Facebook.com and sign up for a free account.
Note: You can create a Facebook App with any valid Facebook User Account, but you may not want to do this with a personal Facebook User Account. Consider whether you should create a second account to use with your professional activities online.
Register as a Facebook Developer
Go to the Facebook Developers Site and click on Login, If you have an account, enter your login credentials (username/password). If you don't have an account, click on the Sign Up link at the top of the page and enter the required account information and click on Sign Up button at the bottom. Review and accept the Facebook policies by clicking No (it will toggle to Yes) and click Next.
Verify your account by entering your phone number and click Send as Text. A text message will be sent to your phone with the confirmation code (this can take up to an hour). Enter the code into the Enter Confirmation Code box and click Register.
Note: Make sure to use a phone number that has not been used to register a previous developer's account. If you do not have another phone number available, you will need to verify your account by adding a credit card.
Note: You will have one day to confirm your email or phone number. For help with Facebook, check out their Help Center.
Access Developers Dashboard
Upon registering for a new Developers Account, you should be directed to the Developers App Dashboard. If not, you will be logged into what will look like a normal Facebook User Account. To access the Facebook Developers Dashboard from your Facebook page, click on Home in the header of the page (you can also click on the Facebook Logo in the upper left corner - left of the Search field). On the Left Menu towards the bottom, click on Manage Apps under the Developer category. For more information on the Facebook Developers App Dashboard, Click Here.
Creating a Facebook App
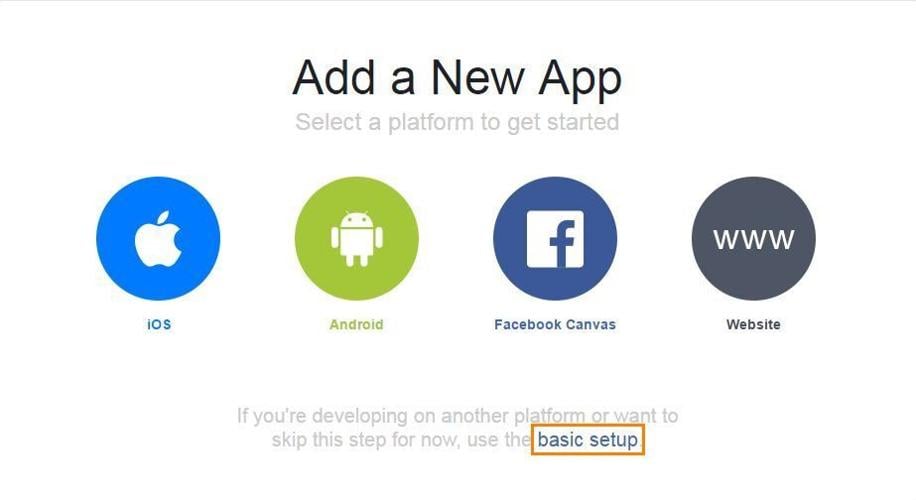
Click on the Create a New App button. This is the Advanced Setup portal. If you want the Basic Setup, that link is on the bottom of Advanced Setup Portal.
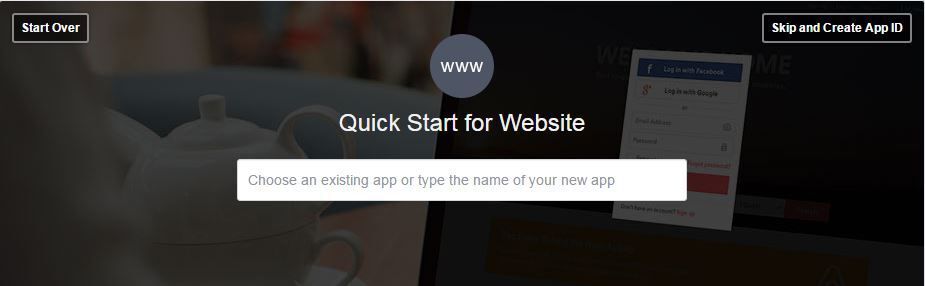
Select the WWW Website App Platform (for Comments) to get started . Enter a Display Name for your App. The Display Name supports up to 32 characters.
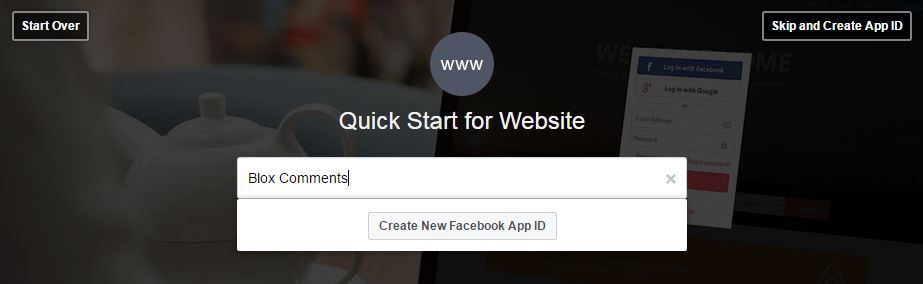
When done, click on Create New Facebook App ID (this automatically appears when you start typing).
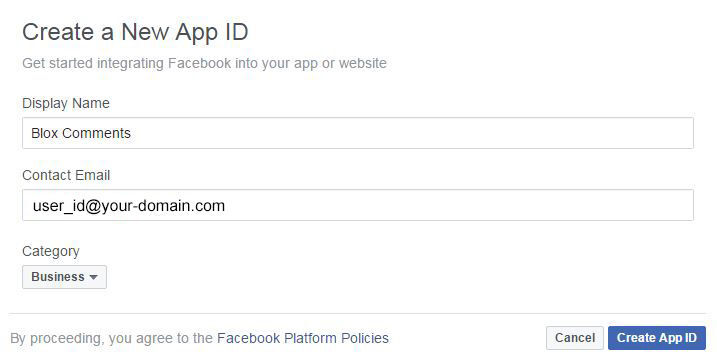
The Create a New App ID window opens with the Display Name you just created as well as your Contact Email address. Change the Category in the Choose a Category drop down menu to Business. Click on Create App ID button.
Note: If you get this error, you need to enter a Mobile Phone Number or a Credit Card to verify your account. The Credit Card does not get charged, it is only used for verification purposes. If this applies to you, once you verify, click on the Create App ID button again.
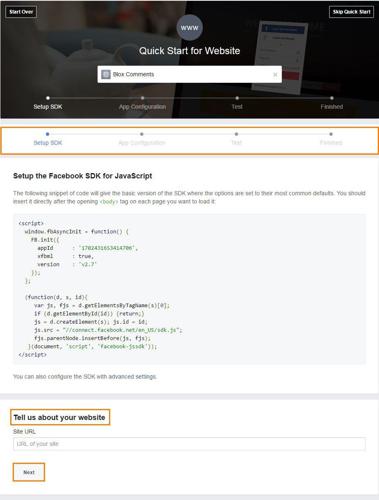
When you click on the Create App button, the App Creation Setup will process (it could take several seconds). Once complete, the Setup the Facebook SDK for JavaScript window appears with the JavaScript code.
The instructions say to insert that code into the tag of your website or page of your website you are using Facebook Commenting. You Do Not Need This. TownNews has taken this code and built it into the BLOX Templates and then uses the App ID to finish the setup process. That said, just below the JavaScript, there is a field where you need to enter your site URL Address - Fill that in. Click on Next.
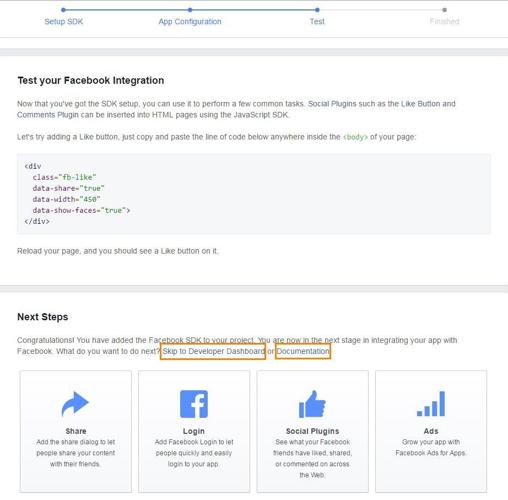
The next screen that appears, Test your Facebook Integration, will have another small script to add a Like and Share button on your site. You do not need to do this as the code is built into the BLOX Templates. You are done with creating your App. Under Next Steps, you can go to the Developer Dashboard or review their Documentation.
Facebook Developer App Dashboard
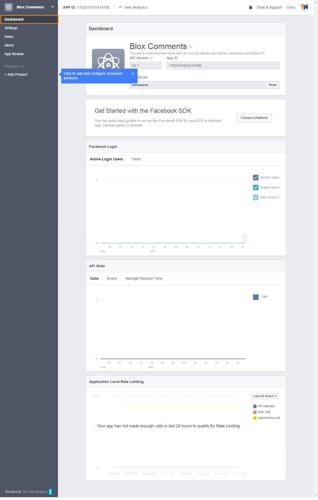
On the Dashboard landing page, you can view your App ID and App Secret (click on Show to get the unencrypted App Secret), create another App using a different Platform and view Active Users, API Stats, and Application Level Rate Limiting.
The header has a drop down menu of all your Apps in the upper left corner of the Navigation menu. To the right is the APP ID. If you hover over it, a Copy function appears so you can click-to-copy it and paste it into your BLOXCMS Site and/or URL Settings. You can also setup Analytics for Apps by clicking on View Analytics next to the APP ID. On the right side of the header, there's a link to additional Tools and Support and Documentation. In the far right corner, is your Account Options - they appear as you hover over your Account Avatar.
App Dashboard Settings
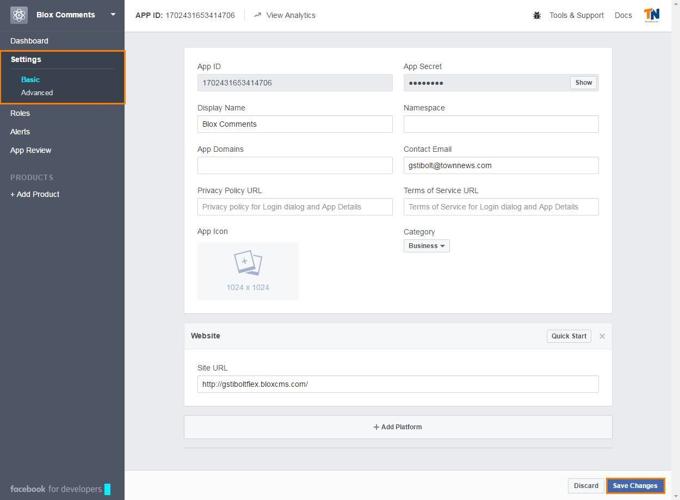
Basic Settings allows you to:
- Obtain the App ID and App Secret
- Change the Display Name
- Change the Email Address
- Enter your Privacy Policy and Terms of Service URL
- Change the Category
- Add an App Icon
- You can also Add a Platform
Select Save to complete your changes.
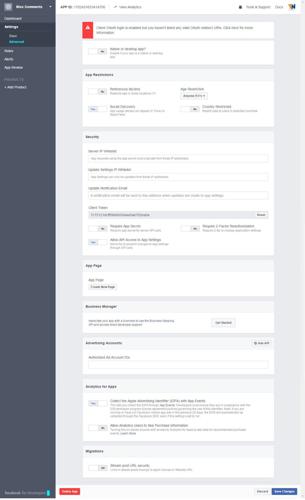
Advanced Settings allows you to:
- Set App to Native or Desktop setting
- Apply App Restrictions on Age, Alcohol References, Social Discovery, and Country Restrictions
- Set Security Settings such as Server IP Whitelist, Notification Email, Reset Client Token, Require App Secret, set Authorization Requirements and API Access
- Create a New App Page
- Establish a Business Manager and use the Business Mapping API
- Authorize Advertising Accounts
- Manage Analytics for Apps
- Set Migration Security settings
Select Save to complete your changes.
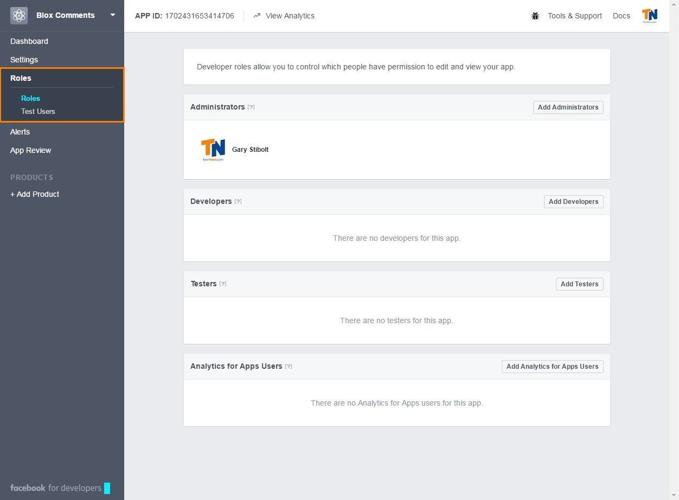
App Dashboard Roles
There are various types of Roles divided into two areas: Roles for Administrators, Developers, Testers, and Analytics for App Users and Test Users.
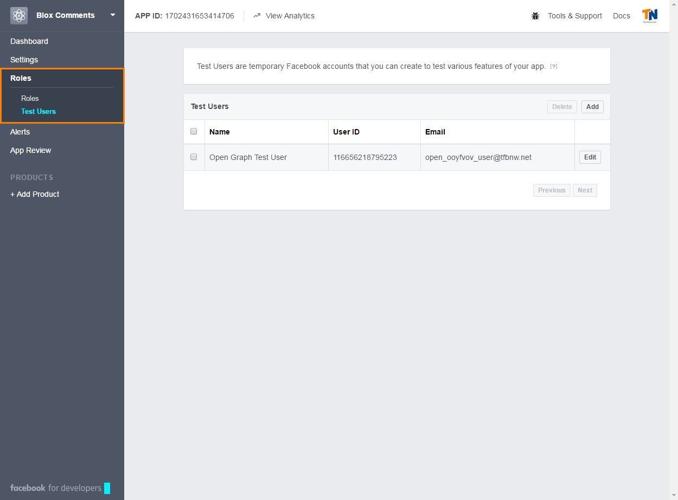
Test Users - are temporary Facebook accounts you can create for testing various features of your App.
Note:
Facebook prefers all Site Administrators be your Facebook Friend(s). However, if they aren't, you need to obtain their Facebook ID or Username. Either way, they must have a verified account. If a Red Triangle appears to the right of the name, they have not verified their account. For information on verifying a Facebook Account, see Facebook's Help Center.
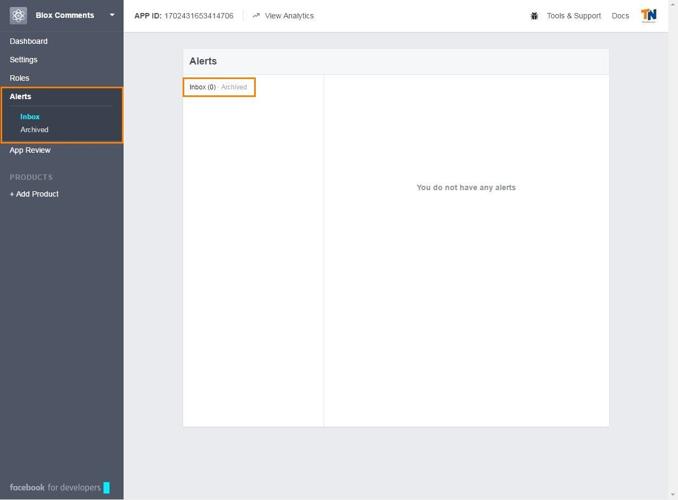
App Dashboard Alerts
Any Alerts for your App are organized here. You have an Inbox for new alerts and an Archived alerts.
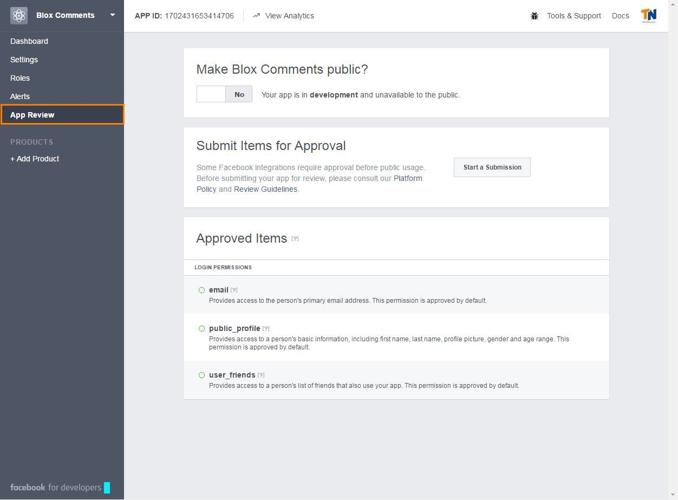
App Dashboard App Review
App Review allows you to set your App to be available to the Public or not. You can also Submit other Facebook Integrations for approval with Public Usage. All Approved Items are listed here as well.
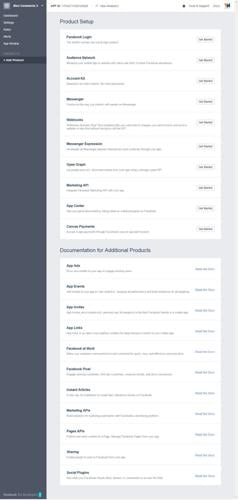
App Dashboard Add Product
This is a link to a section within the App Dashboard that allows you to add App Products to your Facebook Account. There are also links to documentation respective of the App Products Facebook offers.
Note: The products are intentionally Not Documented here as TownNews has no control over Facebooks product offerings. The screen shot is to illustrate what the Add Product App Dashboard page looks like.
Add Facebook App ID to BLOX
Note: Custom Properties Comment Rules Text and Show On New Page only apply to BLOX Comments.
On the BLOX CMS Desktop in the upper left corner, choose Design / Blocks
- Double click on the URL you want to implement Facebook Comments (for entire site, open the root URL).
- Open Page Customizations by clicking on the double arrow on the right side of the page.
- Open Comments by clicking on the down arrow.
- Click the checkbox for Enable Comments and select True.
- Click the checkbox for Commenting Mode and Select the Facebook option.
- Scroll down to Social Tools and expand it.
- Click the checkbox for Facebook Application ID. Type or Paste the App ID found in your Facebook Developers Dashboard.
- Click Save Changes at the top of Page Customizations and Save Layout Changes for the URL.
Facebook Comment and Moderation
To use the Moderation Tool, you must be the Admin for:
- Your Site
- The App ID
- The Facebook Page
- The Facebook Developer Account
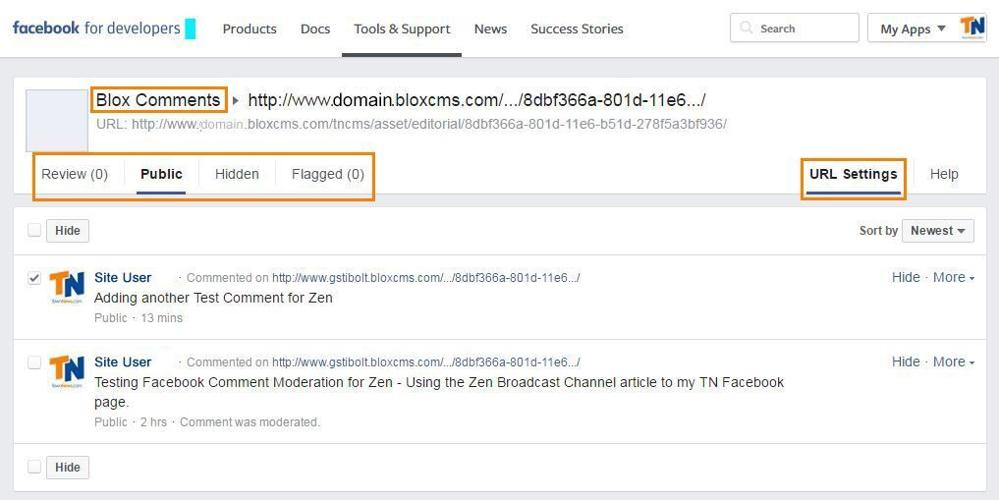
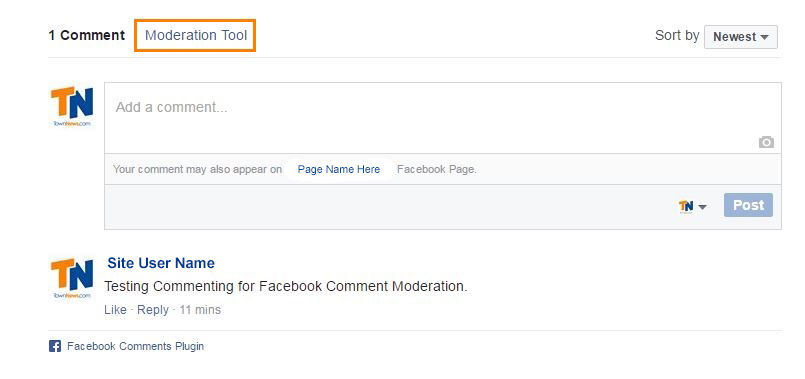
Once Facebook Commenting has been enabled on your site, you will see the Facebook Profile for Comments. It will be positioned at the bottom of the content on the Page (URL). When a User Posts a comment, it will show up below the Add a Comment field on that Page (depending on how commenting is set up - 'with' or 'without' automatic approval). Just above the Add a Comment field, is a link to Facebooks Moderation Tool. When clicked on, it will open the Moderation Tool in a new browser.
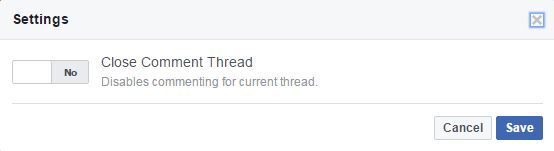
Depending on who can see your Facebook Posts (ie: Friends, Public, etc.), will determine the menu options you have available in the Moderation Tool. Here you can Review, Hide, or Flag comments. You can also Close the Comment Thread to your Facebook Page by clicking on URL Settings.
Clicking on URL Settings, opens a Settings window where you can toggle the Comment Thread on or off. Click Save when you're done.
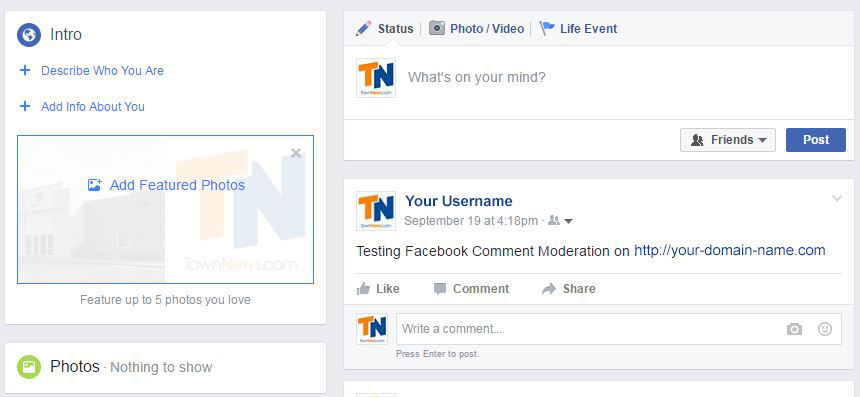
Then on your Facebook Page, Comments will appear.