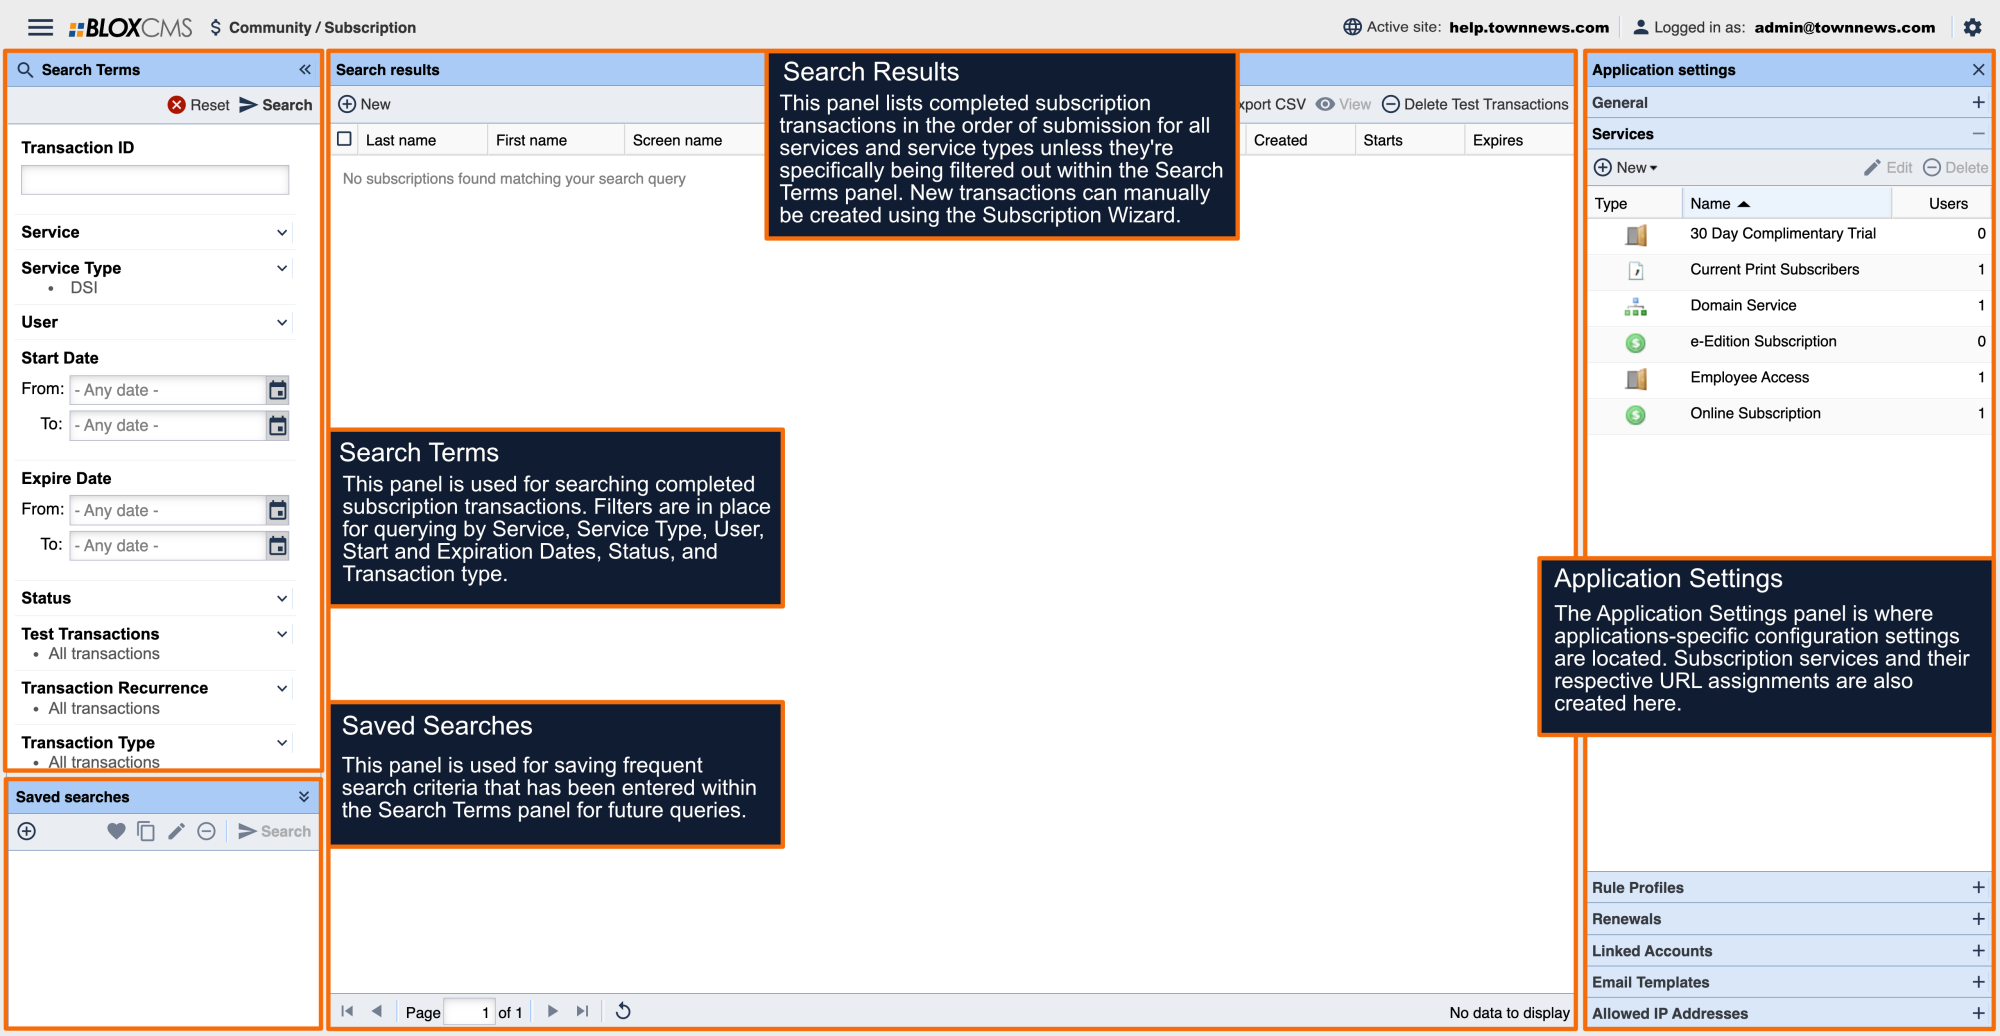

Subscription Services admin
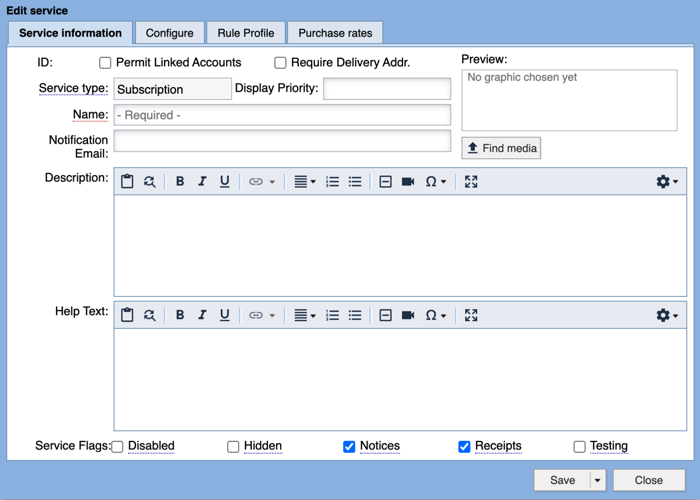
Service Information displays the ID, Service type, Display Priority, Name, Notification Email, Description, Help Text, and Service Flags.
ID: Once Save or Save and close is selected, the system will automatically assign a unique ID number to the service. This service ID will be referenced in notification emails and in the data/feeds FTP directory.
Permit Linked Accounts: This setting allows the subscriber to share their subscription with family and friends. This box will only be visible if your publication has activated this feature in Community / Subscription / Application settings / Linked Accounts.
Require Delivery Addr.: This box should be checked if all subscribers must provide a delivery address. If this box is checked and there is no delivery address associated with the account in the CSV file, the account will not be activated.
Service type: This is set automatically when you create the account. There are several available service types in BLOX CMS: APT Falcon, CSV verification, Domain, DSI, Free, iServices, Mediaspan, Subscription.
Display Priority: This setting is used to sort the order the services appear on the front end of the site. The higher the display priority number the higher in the list the service will appear. If no display number is entered the services will be listed in alphabetical order.
Name: The name for your service is a required field. You want to name your service something that makes sense to the users of your site (examples: Online Subscriber Access, Print Subscriber Access, Free 14 Day Trial). The name of the service will show on the front end to users.
Notification Email: You may enter up to three email addresses (separated by commas) that will receive an email notification when A) a change is made to the CSV file in a CSV Validation service and B) a user subscribes to the service.
Preview:
Description: The description field is not a required field but should generally be used, as it will display for the users of the site. In most cases, you'll want to provide the users with a description of the service they are purchasing.
Help Text: The help text field will be displayed on the subscription page after the user logs in and selects the service. This field can give your subscribers more detailed information and instructions on how to sign up for a service. It can be especially useful for CSV verification services if you need to instruct your customers how to reference validation fields. This field does support HTML code.
Service Flags
Disabled: If checked, the service will be completely disabled. The associated transactions will still remain, but the service will not be visible on the front end, and it will display in the admin with gray text.
Hidden: If checked, the service will remain active but not display on the front end. This means that the URLs that are blocked by this service will still continue to be blocked, but users will not be able to sign up for this service to gain access.
Notices: When checked, users subscribed to this service will be sent notices that their subscription is about to expire, and when it has expired.
Receipts: When checked, users will receive an email receipt on subscription purchase and renewal.
Testing: If checked, every transaction gets marked as a test transaction in the transactions list. (For more information on the Transaction log, see the Transactions Overview below.) If a payment handler is set up and configured, such as PayPal or Authorize.net, it will run the transaction through the payment handler's test processor but not actually take any money.