This article details how users can schedule and publish their live streams in BLOX VMS.
Through the event item type, users can create embed codes that only display the player at the times set by the user.
To set up a live stream event, click the orange New button at upper-right area, then select Event from the drop-down menu that appears. You’ll then be taken to the Create Event screen.
The first thing you’ll want to do on the Create Event screen is upload a thumbnail image. This image will display in the player until the start time of the event. To do this, click the orange pencil button in the Thumbnail area, then click the Select button in the window that appears. From there you can select the thumbnail for your live streaming event, which will then appear in the Thumbnail area of the Create Event screen.
Next, you’ll enter some information about the live event into the system.
In the Stream drop-down menu, select the correct stream from your available live streams.
In the Player drop-down menu, select one of your custom players only if you do not want to use your default player (typically default is just fine).
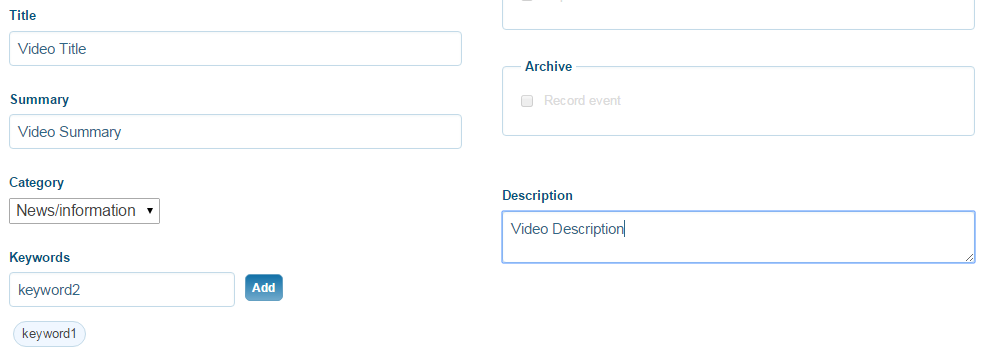
Give your event a Title (required), Summary (optional), Category (required) Keywords (optional), and Description (optional).
In the Schedule area, set your stream schedule by populating the Begin and End date and time fields. If you’d like a stream to be available immediately, hit the Start Now button.
You can also set your live events to repeat on a regular basis. Select the Repeat checkbox and a new display appears. Indicate which day(s) of the week you’d like an event to repeat and the number of weeks you’d like it to repeat. If you want it to repeat without a set end date, leave the Number of weeks field empty.
Click the Save to create your event. The new event will appear in the Events list view and calendar view. Active/ongoing events display with a green color; future and completed events are blue.