
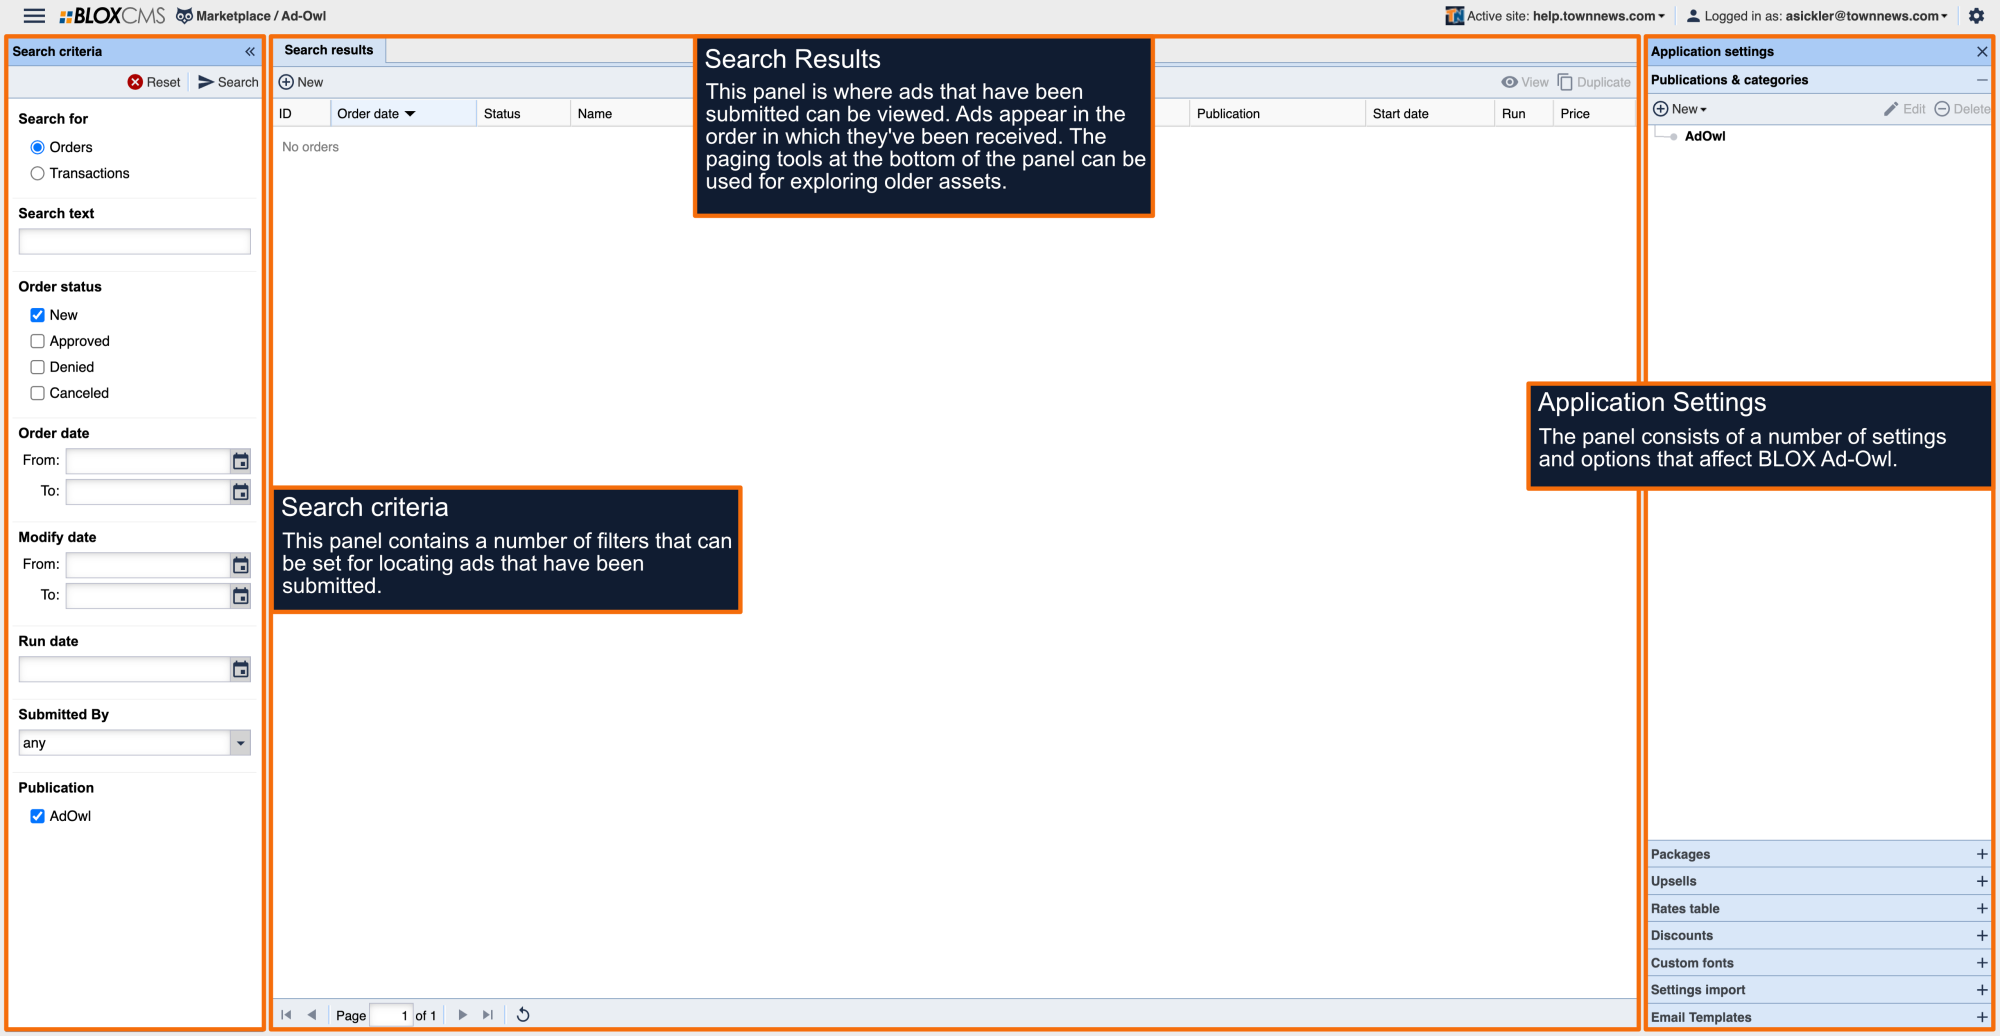
What are Ad-Owl Publications & Categories?
Ad-Owl is based on publications and categories. A publications represents a market or segment of ads, while a category is a specific classification that falls beneath a publication.
Publications can be general or highly specific.
For example, A general publication can represent an entire BLOX Classifieds setup using the following approach:
Ad-Owl (/place_an_ad)
- Announcements
- For Sale
- Garage Sales
- Jobs
- Services
- Vehicles
A specific publication can represent an additional market or segment using the following approach:
Virtual Graduations (/virtual_graduations)
- Bettendorf High School
- Davenport High School
- Moline High School
- Rock Island High School
In the Publications & Categories , admin users can create both Ad-Owl Publications, as well as the categories that are contained within those publications.
Creating a Publication

Creating a publication can be accomplished by select the New button, and then choosing the Publication option from the dropdown menu. This will open an Edit Publication window. The Edit Publication window consists of four bed windows: Configuration, Default Date Rules, Default Layout, and Default Style.
Creating a Category
Creating a category can be accomplished by highlighting a publication and then click on the New button, and click on Category from the dropdown menu.
This can also be accomplished by selecting a publication and then Right-Clicking the mouse.This will populate a contextual menu of options. Choose the + New Category option.
This will open an Edit Category window. The Edit Category window consists of four bed windows: Configuration, Layout (inherited), Style (inherited), and Packages.
NOTE: The category option will only be available after a publication has already been created.
NOTE: In the BLOX CMS Admin, select specific Categories to associate to a Category Upsell. This prevents users being allowed to choose any Category they want, only those associated to that specific package (e.g. Charge extra for Real Estate or Vehicles so a user can not bypass the payment by selecting the Free Category Upsell).
Creating Multiple Categories

Creating multiple categories can be accomplished by selecting a publication or category, and then Right-Clicking the mouse.This will populate a contextual menu of options. Choose the + Create multiple categories option.
This will open an Create Multiple Categories window.
Add Category: Use this option to add a new category.
Upload CSV: Use this option to upload a CSV file of category names. Each line is considered
a separate category formatted as: Class Code, Parent Name, and Child Name. Options include: Upload a File and Choose From Dropbox.
Upload a File: Use this option to upload a CSV file of category names (need help creating a CSV File, Click here). This will open an Upload File window where a file can be located for use. Choose the Upload File button to complete the selection.
Choose From Dropbox: Use this option to upload a file using the Dropbox osting service.
For more information about using Dropbox, please view the following documentation: Dropbox.
Category Name: The name of the category. This field is required.
Classification: A classification code can be included within a category. This code is used to map over to categories when the order is promoted into an online ad.
Up Arrow: Use this option to move the category to a higher position. Admins can also use the keyboard shortcut Shift + Up.
Down Arrow: Use this option to move the category to a lower position. Admins can also use the keyboard shortcut Shift + Down.
Left Arrow: Use this option to remove an indent. Admins can also use the keyboard shortcut Shift + Left.
Right Arrow: Use this option to add an indent. Admins can also use the keyboard shortcut Shift + Right.
+: Use this option to add a child category. Admins can also use the keyboard shortcut Shift + Enter.
-: Use this option to remove a category.
Changing Category Display Positions
After categories have been created, each will be displayed within the Publications & Categories . Categories are listed on the front-end in the order that they're created. To modify category display order, admins can simply drag and drop them into the correct order within the Publications & Categories . Once you're satisfied with the category display order, select the Save button to finalize your changes. Changes can be reverted by choosing the Discard button.
Alphabetizing With Siblings
Alphabetizing categories with siblings can be accomplished by either selecting a publication or category, and then right-clicking the mouse.This will populate a contextual menu of options.
Choose the Alphabetize with siblings option. This will put the chosen categories in alphabetical order.