The Export Snippet dialog shows the folder created, titled UXP.
Export a Snippet with the BLOX Total CMS Plug-in for Adobe InDesign
Here's how to export a snippet with the BLOX Total CMS client for Adobe InDesign.
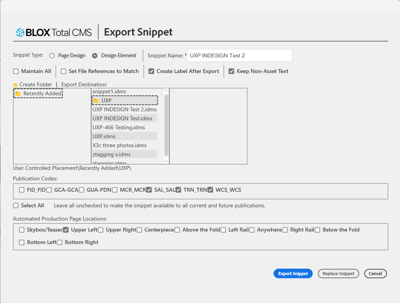
After the Export Snippet dialog opens,
Select the `Snippet Type:` Page Design or Page Element
Fill in the `Snippet Name:` field
Next, select checkboxes,
Maintain All: This option selects and retains all the frames.
Set File References to Match: Ensures that all frames capable of holding content use the same file reference placeholder. This is particularly beneficial for Design Element snippets.
Create Label After Export: Creates a label for the snippet file. Once the snippet is exported or replaced, a label will be generated inside a frame adjacent to the document, showing the label and other snippet details such as the publication code and location.
Keep Non-Asset Text: Allows the snippet to retain its existing text during export. Normally, the Export Snippet process replaces the text with the element type (e.g., print_headline, main story, etc.), but this option keeps the original formatted text.
The Folder Tree: There is an option to create a folder, give it a name, then click the checkmark to create it or the x to abort.
To view the folder tree using the plug-in, select the snippet, then click new. View it on your local machine by locating the Recently Added folder, then the folder you named (e.g., \Users\ecently Added\UXP).
The Export Snippet dialog shows the folder created, titled UXP.
Publication Codes: Select the appropriate publication codes from the list. If you want the snippet to be available for all current and future publications, leave the "Select All" option unchecked.
Automated Production Page Locations: Choose where on the page the snippet should be placed.